Orchids are one of the most elegant and exotic flowering plants you can grow indoors. While they may seem intimidating at first, planting orchids is easier than many people think — especially when done correctly from the start. In this guide, you’ll learn exactly how to plant orchids for healthy roots, long-lasting blooms and thriving growth. Our gardening blog is a perfect place to find all the information you need!
Choosing the Right Orchid Variety

Choosing the best orchid for your environment and skill level is the first step toward success. Some orchids are more forgiving and adaptable, making them perfect for beginners. Others may require more precise conditions, so matching the orchid to your care capacity is essential.
Best Orchid Types for Beginners
If you’re new to growing orchids, start with varieties that are known for their resilience and ease of care. These beginner-friendly orchids thrive in typical home environments and require minimal maintenance:
- Phalaenopsis (Moth Orchid) One of the most popular and easiest orchids to grow. It thrives in indoor conditions with indirect light and blooms for several months. Perfect for first-time orchid owners.
- Dendrobium: Known for its tall, elegant canes and clusters of blooms. It adapts well to household environments and needs bright light and moderate watering. Some varieties bloom multiple times a year.
- Oncidium (Dancing Lady Orchid): Features sprays of bright, fluttery flowers that resemble dancing figures. It tolerates a wide range of conditions and prefers good airflow and moderate humidity. Great for adding cheerful color indoors.
- Paphiopedilum (Lady Slipper Orchid): This unique orchid has slipper-shaped blooms and prefers low to medium light. It doesn’t require a dormancy period, making it easy to care for year-round.
- Cattleya: Famous for large, fragrant flowers and a wide variety of colors. While it needs bright, filtered light, it’s relatively low-maintenance and blooms reliably with proper care.
Understanding Environmental Needs
Different orchids have specific needs when it comes to light, temperature and humidity. For example, Phalaenopsis thrives in low to medium light, while Dendrobiums prefer brighter locations. Understanding these environmental requirements helps you choose a variety that matches your space and care habits.
Indoor vs. Outdoor Orchids
Some orchids grow well indoors, while others are better suited for outdoor climates. Cymbidiums and Epidendrums can tolerate cooler outdoor conditions, while most tropical orchids are best grown indoors. Consider your region’s climate and available space before selecting your orchid.
Inspecting and Preparing Orchid Roots
Healthy roots are vital to orchid success. Before planting, take time to inspect, clean and trim the roots to remove any dead or damaged tissue. This process helps prevent disease and encourages new growth.
How to Clean and Trim Orchid Roots
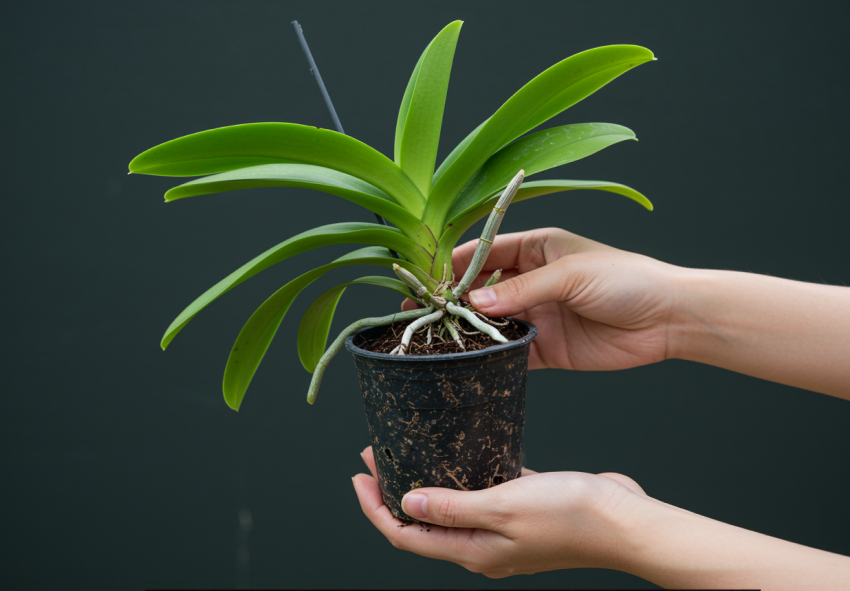
Start by gently removing the orchid from its container and rinsing the roots with lukewarm water. Use sterilized scissors to trim away mushy, blackened, or dried-out roots. Healthy roots should be firm and green or white, depending on moisture content.
Signs of Healthy Orchid Roots
Healthy roots are essential for your orchid’s growth and blooming. Knowing what to look for can help you maintain your plant’s overall health and catch any problems early:
- Firm and Plump Texture: Healthy roots feel firm and fleshy, not mushy or brittle. They should bounce back slightly when gently pressed.
- Bright Green or Silvery Sheath: Roots often have a green or silvery outer layer called velamen. This indicates good hydration and nutrient absorption.
- No Signs of Decay or Soft Spots: Healthy roots are free of dark, mushy patches or spots that look rotten or dried out.
- Active Growth Tips: New root tips are usually white or light green and are a clear sign that your orchid is actively growing.
- Good Root Coverage in Pot: Roots should fill the pot comfortably without overcrowding or excessive gaps, anchoring the plant securely.
Dealing with Root Rot or Mold
If you spot signs of rot or mold, soak the roots in a fungicide solution or hydrogen peroxide mix before planting. Remove all affected roots and let the plant air dry. This step helps prevent fungal spread and ensures a fresh start in the pot.
Selecting the Proper Orchid Pot

Choosing the right pot is essential for airflow, drainage and long-term plant health. Orchids don’t like “wet feet,” so good drainage and a snug fit are must-haves.
Choosing the Right Size Pot
Orchids prefer tight spaces that keep roots slightly restricted. A pot that’s too large holds excess moisture, leading to rot. Choose a pot that comfortably fits the root mass with just a little room to grow.
Plastic vs. Clay vs. Slotted Pots
Plastic pots retain moisture and are lightweight, while clay pots allow for more airflow but dry out faster. Slotted orchid pots are ideal because they offer both drainage and ventilation, promoting healthy root development.
Importance of Drainage Holes
Drainage holes are critical for orchid health. They prevent water from pooling in the pot, reducing the risk of root rot. Without proper drainage, even the best orchid potting mix can become a hazard.
Choosing and Preparing Orchid Potting Mix
Unlike regular houseplants, orchids need a special potting mix that promotes airflow around the roots. Selecting the correct medium sets your plant up for long-term success.
Best Orchid Potting Materials
The most common orchid potting mixes include fir bark, sphagnum moss, perlite and charcoal. These components ensure excellent aeration and drainage. Choose a mix based on the orchid type and your home’s humidity.
When and How to Replace Potting Mix
Orchid potting mix breaks down over time, which can reduce drainage and invite disease. Replace it every 12–18 months or sooner if it becomes soggy or smells musty. Always use fresh, sterilized materials when repotting.
Avoiding Regular Garden Soil
Never use traditional garden soil for orchids. It’s too dense and holds too much moisture, which suffocates orchid roots. Always choose a light, chunky mix specifically formulated for orchids.
Planting the Orchid
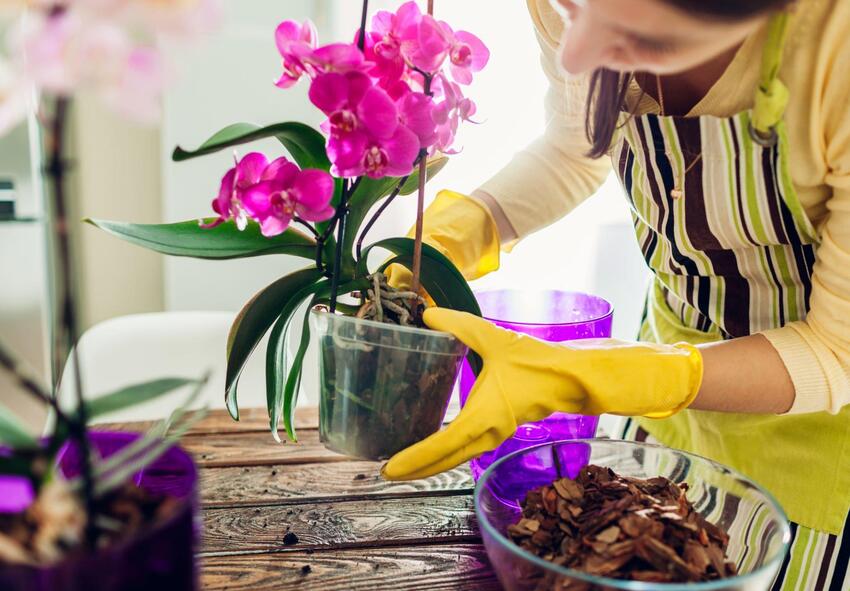
Planting your orchid correctly ensures strong root anchorage and healthy top growth. Take your time with positioning and filling the pot to avoid stress on the plant. Here are some tips for you:
- Positioning the Orchid in the Pot: Place the orchid so the base of the plant sits just above the potting mix. The roots should nestle into the medium, not be crammed tightly or left dangling above the surface. Avoid burying the crown, as this can lead to rot.
- Filling in with Potting Mix: Gently add potting mix around the roots, tapping the pot to settle it without compacting. Make sure all roots are surrounded, but maintain airflow by keeping the mix loose. This supports root hydration without suffocation.
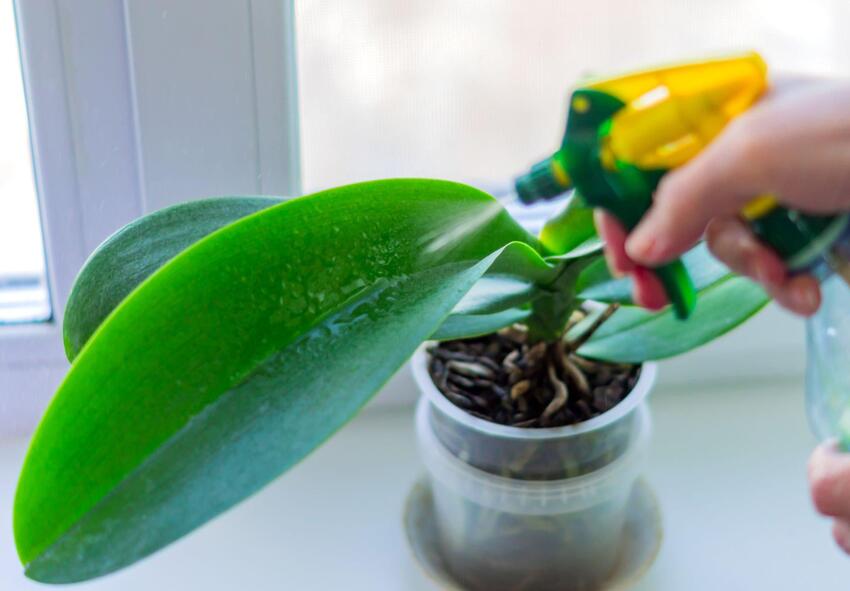
- Initial Watering After Planting: After planting, water lightly to help the mix settle and hydrate the roots. Avoid soaking the plant; it’s better to gradually resume a normal watering schedule once the orchid adjusts. Ensure water drains freely from the pot.
Aftercare and Maintenance

Ongoing care is essential for encouraging blooms and keeping your orchid healthy. Light, humidity and patience are key elements in post-planting success.
Light and Placement Guidelines
Most orchids need bright, indirect light to thrive. East- or north-facing windows are great for Phalaenopsis, while other types like Cattleya prefer brighter spots. Avoid direct sun that can scorch the leaves.
Humidity and Airflow Tips
Orchids prefer humidity levels between 50–70%. Use a humidity tray or room humidifier if your home is dry. Good airflow is also important — place fans nearby or open windows occasionally to prevent mold and disease.
When to Expect New Growth or Blooms
Depending on the variety, orchids may take several weeks to months to show new growth. Blooms usually appear once the plant is well-established and growing in ideal conditions. How often orchids bloom also varies by type — some may flower once a year, while others can bloom multiple times.
Conclusion
Planting orchids requires attention to detail, from choosing the right pot and mix to trimming and positioning roots properly. When done right, you set the stage for healthy growth and long-lasting blooms. Explore our online store for orchid pots, premium potting mixes and top-rated orchid varieties to get started today!
Frequently Asked Questions (FAQs) about Planting Orchids
1. How often should I water my newly potted orchid?
After planting, water your orchid lightly to settle the potting mix. Then, allow the mix to dry slightly between waterings. Typically, watering once a week is sufficient, but adjust based on your environment’s humidity and temperature to avoid root rot or dehydration.
2. What is the best potting mix for orchids?
Orchids prefer airy, well-draining mixes like bark, sphagnum moss, perlite, or charcoal. Avoid regular garden soil, which retains too much moisture and suffocates roots. The right mix promotes airflow and prevents root rot, essential for healthy orchid growth.
3. Can I order orchids from your online store?
Yes, you can! Our online store Dutch-bulbs.com offers a wide selection of orchid plants, including different varieties and colors. We take pride in providing top-quality plants that are carefully cultivated and shipped with care to ensure they reach you in perfect condition.
4. How do I know if my orchid roots are healthy?
Healthy orchid roots are firm, plump and covered in a green or silvery velamen layer. Avoid roots that are mushy, dark, or dry. New growth usually appears as white or light green root tips, indicating the plant is thriving.
5. Can I plant orchids outdoors, or should they be kept indoors?
It depends on the orchid variety and your climate. Tropical orchids like Phalaenopsis thrive indoors, while hardier types like Cymbidium can grow outdoors in mild climates. Always consider temperature, humidity and light requirements before deciding.
Published: 14.07.2025
