Seasonal gardening is a great way to enjoy the beauty and bounty of nature throughout the year. By planning and planting according to the seasons, you can ensure that your garden always has something to offer, whether it`s spring flowers, summer fruits, autumn colors, or winter greens.
One of the most important seasons for seasonal gardening is spring. Spring is the time when nature awakens from its winter slumber and bursts into life. It`s also the time when you need to prepare your garden for the growing season ahead. Preparing your garden for spring can make a big difference in how well your plants perform and how much you enjoy your gardening experience.
We’ll cover how to tidy up, prune, mulch, and fertilize your garden in this article as we examine how to get your garden ready for spring.
By following several rules, you will be able to grow a gorgeous and productive spring garden that will give you fresh flowers, fruits, vegetables, and herbs. You will also be able to take advantage of the benefits of seasonal gardening.
By planting according to the seasons, you can provide your plants with the optimal conditions they need to thrive. You can also avoid planting crops that are not suited for your climate or soil, which can reduce stress and disease. By preparing your garden for spring, you can give your plants a head start and extend their growing season. You can also increase your harvest by planting crops that complement each other and attract beneficial insects and pollinators. Gardening in accordance with the seasons allows you to appreciate nature’s variety and beauty. You may also have fun trying with various plants and kinds that appeal to your tastes and preferences.
Assessing Your Garden and Soil
Before you start planting your spring garden, it`s important to assess your garden and soil to determine what kind of plants will grow best and what kind of amendments you need to make. Different plants have different preferences for soil texture, drainage, nutrient levels, and pH, so knowing your soil type and condition can help you choose the right plants and optimize their growth.
Drainage is how well water moves through the soil. Good drainage prevents waterlogging, root rot, and erosion. To check for drainage, dig a hole about 12 inches deep and fill it with water. Wait for the water to drain completely, then fill it again. Measure how long it takes for the water to drain the second time. If it takes less than 10 minutes, you have sandy soil with fast drainage. If it takes more than 30 minutes, you have clay soil with slow drainage. If it takes between 10 and 30 minutes, you have loamy soil with moderate drainage.
Nutrients are the components that plants need to grow and thrive. The three most important nutrients are nitrogen (N), phosphorus (P), and potassium (K), together known as N-P-K. To evaluate nutrient levels, you may use a home test kit or submit a soil sample to a professional lab. A soil test will determine the amount of N-P-K in your soil and the kind of fertilizer you should apply.
The pH of your soil indicates how acidic or alkaline it is. Most plants like a pH of 6 to 7, which ranges from slightly acidic to neutral. Some plants, such as blueberries and azaleas, require acidic soil (below 6), while clematis and lavender need alkaline soil (above 7). You may use a home test kit to determine pH or send a soil sample to a professional lab. A soil test will reveal your soil’s pH and the kind of amendments required to correct it.
Soil texture is how fine or coarse your soil particles are. There are three main types of soil texture: sand, silt, and clay. Sand has the largest particles and feels gritty. Silt has medium-sized particles and feels smooth. Clay has the smallest particles and feels sticky. The ideal soil texture for most plants is loam, which is a mixture of sand, silt, and clay. To check for soil texture, you can do a simple jar test or a ribbon test. For the jar test, fill a clear glass jar about half full with water and add a teaspoon of salt or detergent. Then add some soil from your garden and shake well. Let the jar sit for a day or two until the soil settles into layers. The bottom layer is sand, the middle layer is silt, and the top layer is clay. The thickness of each layer tells you how much of each type of soil you have. For the ribbon test, take a handful of moist soil and squeeze it into a ball. Then try to roll it into a ribbon between your thumb and forefinger. If it forms a long ribbon that holds together well, you have clay soil. If it forms a short ribbon that breaks easily, you have loamy soil. If it does not form a ribbon at all, you have sandy soil.
Once you have assessed your garden and soil, you can improve your soil quality by adding compost or organic matter. Compost is decomposed organic matter that adds nutrients, improves drainage, retains moisture, and supports beneficial microorganisms in the soil. Organic matter can be any plant or animal material that breaks down in the soil, such as leaves, grass clippings, manure, straw, or wood chips. Adding compost or organic matter can help improve any type of soil by making it more fertile, loamy, and healthy.
Planning Your Garden

After you have assessed your garden and soil, the next step is to plan your garden layout and choose the right plants for your region and soil type. Planning your garden can help you maximize your space, create visual interest, and avoid common problems such as pests, diseases, and weeds.
Depending on where you live, you will have different options for what plants you can grow successfully. You can use the USDA hardiness zone map to find out what plants are suitable for your climate. You can also use a plant finder tool or a plant encyclopedia to search for plants by zone, sun exposure, soil type, bloom time, color, height, and other criteria. You can also visit local nurseries or gardens to see what plants are thriving in your area and get advice from experts.
Once you have a list of plants you want to grow, you need to decide where to place them in your garden. You can use a graph paper or a garden planner app to sketch out your garden layout. Consider factors such as sun exposure, drainage, plant size, plant shape, plant color, plant texture, and plant function when designing your layout. For example, you can group plants with similar sun and water needs together, place taller plants in the back and shorter plants in the front of a border, create focal points with contrasting colors or shapes, and use plants with different textures to add variety and interest.
If you are growing vegetables or herbs in your garden, you can use crop rotation and companion planting to improve your yield and prevent problems. Crop rotation means changing the location of different types of crops each year to avoid depleting the soil of nutrients and attracting pests and diseases. For example, you can rotate crops by plant family, such as brassicas (cabbage, broccoli, kale), legumes (beans, peas), solanaceae (tomatoes, peppers), and cucurbits (cucumbers, squash). Companion planting means placing plants that benefit each other near each other to enhance growth, repel pests, attract pollinators, or provide support. For example, you can plant basil near tomatoes to deter aphids and improve flavor, marigolds near cabbage to repel cabbage worms and nematodes, nasturtiums near cucumbers to lure away cucumber beetles, or corn near beans and squash to form a “three sisters” garden.
Starting Seeds Indoors
One of the benefits of starting seeds indoors is that you can get a head start on your spring garden and grow a wider variety of plants that may not be available at your local nursery. Starting seeds indoors can also save you money and give you more control over the quality and health of your plants.
To start seeds indoors, you will need to do the following steps:
- Choose the right containers: You can use seed trays, peat pots, egg cartons, yogurt cups, or any other small containers that have drainage holes at the bottom. Make sure to wash and sterilize any recycled containers before using them. You can also use biodegradable pots that can be planted directly into the ground without disturbing the roots.
- Choose the right soil: You will need a seed starting mix that is light, fluffy, and sterile. Do not use garden soil or potting soil, as they may contain pathogens, pests, or weed seeds that can harm your seedlings. You can buy seed starting mix at a garden center or make your own by mixing equal parts of peat moss, perlite, and vermiculite.
- Choose the right lighting: Seeds need adequate light to germinate and grow. You can use a sunny windowsill, but make sure to rotate the containers regularly to prevent the seedlings from leaning towards the light. You can also use artificial lights, such as fluorescent tubes or LED grow lights, that are placed 2 to 4 inches above the seedlings and kept on for 12 to 16 hours a day. You can adjust the height of the lights as the seedlings grow.
- Plant the seeds: Follow the instructions on the seed packet for how deep and how far apart to plant the seeds. Some seeds need light to germinate, so do not cover them with soil. Others need darkness, so cover them lightly with soil or a paper towel. Label each container with the name and date of planting. Water gently with a spray bottle or a watering can with a fine nozzle. Cover the containers with plastic wrap or a clear dome to create a humid environment and speed up germination.
- Water and fertilize: Keep the soil moist but not soggy. Check daily and water as needed. Avoid overwatering or underwatering, as both can cause problems for your seedlings. Once the seeds germinate, remove the plastic cover and move the containers to a bright location. When the seedlings have two sets of true leaves (not counting the first pair of cotyledons), you can start fertilizing them with a diluted liquid fertilizer every week or two.
- Transplant the seedlings: When the seedlings are big enough and have developed strong roots, you can transplant them into larger pots or into your garden. Before transplanting, you need to harden off your seedlings by gradually exposing them to outdoor conditions for a week or two. Start by placing them in a sheltered spot for a few hours a day and increase the time and exposure each day until they are ready to be planted.
Planting and Maintaining Your Garden
Once you have started your seeds indoors and hardened them off, you are ready to plant them in your garden. Planting and maintaining your garden properly can ensure that your plants grow well and produce abundant flowers, fruits, and vegetables.
First of all you need to follow the instructions on the seed packet or the plant tag for how deep, how far apart, and when to plant your plants. Make sure to choose a location that matches the sun and water requirements of your plants. Dig a hole that is slightly larger than the root ball of your plant and gently loosen the roots before placing it in the hole. Fill the hole with soil and press firmly around the base of the plant. Water thoroughly after planting.
Watering is one of the most important ways to care for your garden. Plants need water to absorb nutrients, photosynthesize, and transpire. The amount and frequency of watering depends on the type of plant, the weather, and the soil. Generally, you should water deeply and infrequently, rather than shallowly and often. This encourages the roots to grow deeper and stronger. You can check the soil moisture by inserting your finger into the soil up to the second knuckle. If it feels dry, it`;s time to water. If it feels moist, you can wait. Avoid watering during the hottest part of the day or at night, as this can cause fungal diseases or evaporation. Water at the base of the plant rather than overhead, as this can prevent leaf scorch or disease.
Fertilizing can provide your plants with extra nutrients that may not be available in the soil. However, over-fertilizing can cause more harm than good, as it can burn the roots, reduce flowering or fruiting, or attract pests and diseases. You should follow the instructions on the fertilizer package for how much and how often to apply it. You can also use organic fertilizers, such as compost, manure, or worm castings, that are more gentle and beneficial for the soil. You should avoid fertilizing during drought or frost conditions, as this can stress your plants.
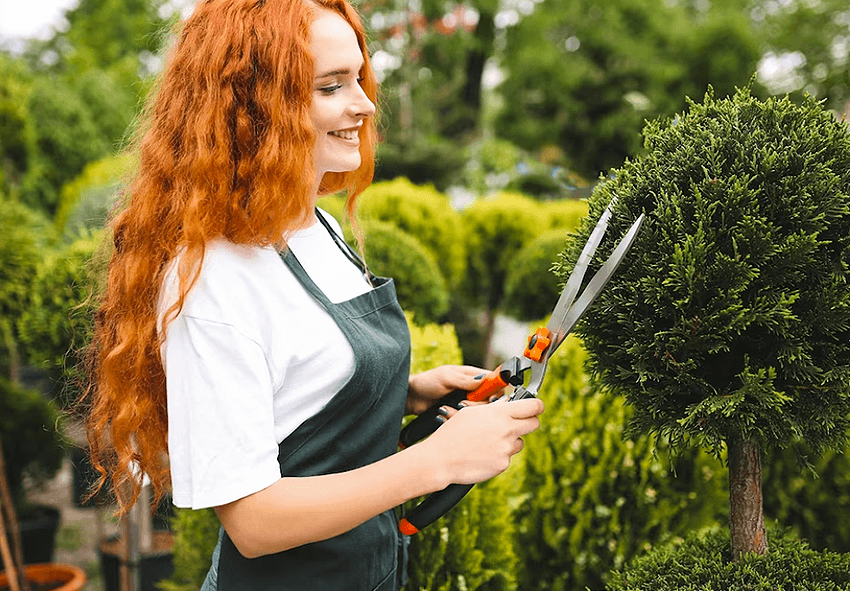
Pruning can help your plants maintain their shape, size, health, and productivity. Pruning can remove dead, diseased, or damaged branches, improve air circulation and light penetration, encourage new growth and flowering, and prevent pests and diseases. However, not all plants need pruning or benefit from it. You should research your specific plants to find out if they need pruning and when and how to do it. Generally, you should prune in late winter or early spring before new growth starts, using sharp and clean tools. You should make clean cuts at an angle just above a bud or a branch collar. You should avoid pruning more than one-third of a plant at a time or pruning during hot or cold weather.
Pests and diseases can affect any garden, but you can prevent or minimize them by using natural remedies and companion planting. Natural remedies include using physical barriers (such as row covers or netting), traps (such as sticky traps or pheromone traps), repellents (such as garlic spray or chili pepper spray), predators (such as ladybugs or lacewings), or botanicals (such as neem oil or pyrethrum). Companion planting means growing plants that benefit each other by repelling pests, attracting beneficial insects, providing shade or support, or improving soil quality. For example, you can plant marigolds near tomatoes to deter nematodes and aphids; basil near cucumbers to repel cucumber beetles; nasturtiums near cabbage to lure away cabbage worms; or corn near beans and squash to form a “three sisters” garden.
Harvesting and Preserving Your Garden⠀
The final step of enjoying your spring garden is harvesting and preserving your produce. Harvesting and preserving your produce can allow you to enjoy the fruits of your labor for longer and prevent waste. You can also save seeds from your plants for future seasons.
To harvest and preserve your produce, you will need to do the following steps:
- Harvest properly: Harvesting at the right time and in the right way can ensure that your produce is fresh, ripe, and flavorful. You should follow the instructions on the seed packet or the plant tag for when and how to harvest your produce. Generally, you should harvest early in the morning or late in the evening, when the temperature is cooler and the produce is less likely to wilt. You should use sharp and clean tools, such as scissors, knives, or pruners, to cut the produce without damaging the plant. You should handle the produce gently and avoid bruising or crushing it. You should wash the produce thoroughly and remove any dirt or insects.
- Store properly: Storing your produce properly can extend its shelf life and prevent spoilage. Different types of produce have different storage requirements, depending on their temperature, humidity, and light preferences. You should follow the instructions on the seed packet or the plant tag for how to store your produce. Generally, you should store fruits and vegetables separately, as some fruits emit ethylene gas that can cause vegetables to ripen faster and spoil. You should also store produce according to its ripeness, as some produce continues to ripen after harvesting while others do not. Some examples of storage methods are:
- Refrigerating: Refrigerating can keep some produce fresh and crisp for longer. You should refrigerate produce that is prone to wilting, such as leafy greens, herbs, berries, and cucumbers. You should also refrigerate produce that has reached its peak ripeness, such as tomatoes, peppers, and stone fruits. You should store refrigerated produce in perforated plastic bags or containers with lids to maintain moisture and prevent drying out.
- Freezing: Some vegetables may be preserved by freezing for weeks or even years. Fruit and vegetables with a lot of water, such as maize, peas, beans, zucchini, and berries, should be frozen. Produces like pumpkin, squash, apples, and rhubarb that you want to use for baking or cooking later should also be frozen. Before freezing your produce, you should wash, peel, cut, and blanch (shortly boil) it. It should be placed in frozen bags or containers that are labeled and date-stamped. Avoid overfilling and allow some room for growth.
- Drying: Drying certain veggies may concentrate their flavor and nutritional value. Herbs, mushrooms, peppers, tomatoes, and apples should all be dried since they contain little water. Additionally, you should dry any ingredients, such as apple chips, basil, oregano, chili flakes, and sun-dried tomatoes, that you intend to use for seasoning or snacking in the future. Your veggies may be dried in a dehydrator, an oven, or a sunny outdoor space. Your veggies should be well cleaned, thinly sliced, and put in a single layer on a rack or baking pan. Dry it at a low temperature (about 140°F or 60°C) until it becomes leathery or brittle. Dry foods should be stored in airtight jars or bags and maintained in cool, dark locations.
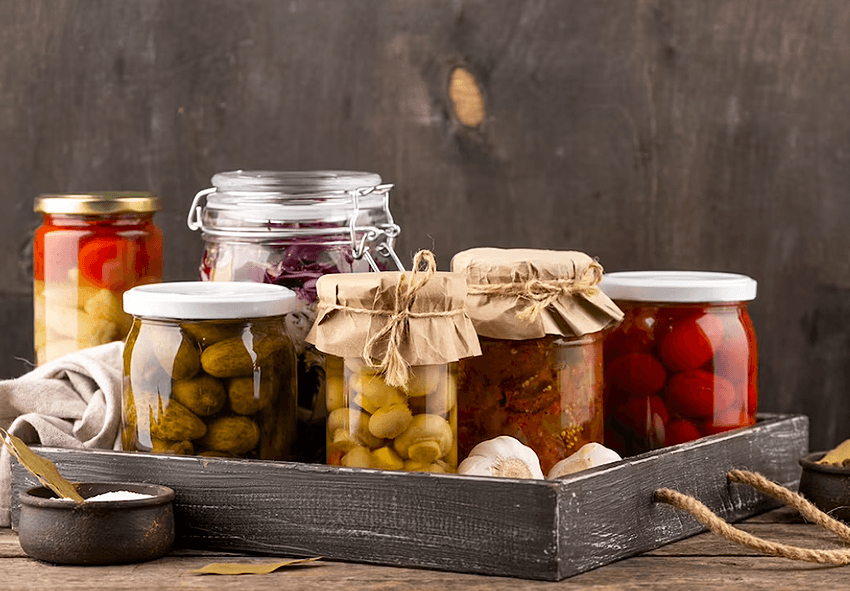
- Pickling: Pickling can preserve some produce by immersing it in vinegar or brine (salt water). You should pickle produce that has a crunchy texture and a tangy flavor, such as cucumbers, carrots, beets, onions, garlic, and cabbage. You should also pickle produce that you want to use for salads or sandwiches later, such as dill pickles, sweet pickles, pickled eggs, sauerkraut, and kimchi. You can pickle your produce using a hot water bath canner or a refrigerator method. You should wash, sterilize, and fill your jars with your produce and your pickling liquid of choice (such as vinegar, sugar, salt, spices, herbs, etc.). You should seal the jars tightly and process them in boiling water for 10 to 15 minutes (for hot water bath method) or store them in the fridge for at least a week (for refrigerator method).
- Canning: Canning can preserve some produce by heating it in sealed jars to kill bacteria and create a vacuum seal. You should produce that has a low acid content, such as green beans, carrots, corn, peas, and tomatoes. You should also produce that you want to use for soups, sauces, or jams later, such as pumpkin puree, tomato sauce, or strawberry jam. You can can your produce using a hot water bath canner or a pressure canner, depending on the acidity of the produce. You should wash, peel, chop, and cook your produce before canning it. You should fill your jars with your produce and your canning liquid of choice (such as water, juice, syrup, or vinegar). You should leave some headspace at the top of the jar and remove any air bubbles. You should wipe the rims of the jars and seal them with lids and bands. You should process the jars in boiling water or under pressure for the recommended time (depending on the type and size of the produce). You should let the jars cool completely and check the seals before storing them in a cool and dark place.
- Save seeds: By saving the seeds from your plants, you can replant them the following year and maintain their genetic diversity. Only heritage or open-pollinated plant varieties should be used for seed saving. Crossbred hybrid plants may not give birth to offspring that are true to type since they are made up of two different kinds. Seeds from strong, robust plants with the traits you want to maintain should also be saved. Seeds from plants that are sick, weak, or that have been cross-pollinated with other types shouldn’t be saved. When the seeds are finished maturing and have dried on the plant, you should harvest them. It is important to thoroughly clean the seeds after removing them from the pulp, husk, or pod. The seeds should be fully dried in a warm, airy environment. Label the seeds with their names and the date they were collected. The seeds should be kept in a dry, cool area in glass jars or paper envelopes.
Conclusion

Spring is a wonderful time to start a garden and enjoy the beauty and bounty of nature. In this article, we have covered how to prepare your garden for spring, plan your garden layout and choose the right plants, start your seeds indoors, plant and maintain your garden properly, and harvest and preserve your produce. By following these tips, you can ensure that you have a successful and rewarding spring garden that will provide you with fresh flowers, fruits, vegetables, and herbs. The key is to get started early and plan ahead. Don`t wait until the last minute to get your garden ready for spring. Start now and you will be amazed by the results. Gardening is a fun and fulfilling hobby that can bring you joy and satisfaction. Happy gardening!
Frequently Asked Questions (FAQs) about Preparing Garden for Spring
1. Can I order plants and gardening supplies from your online store to prepare for spring?
Absolutely! Our online store offers a wide variety of plants, seeds, and gardening tools to help you prepare your garden for spring. We carefully curate our selection to ensure you have access to high-quality, healthy plants and top-notch gardening essentials. Whether you’re looking for vibrant spring flowers, perennial shrubs, or organic fertilizers, you’ll find it in our store. Plus, we provide detailed product descriptions and helpful tips to assist you in making the right choices for your garden. Rest assured, our secure online ordering system makes it easy and convenient to get everything you need delivered to your doorstep, so you can kickstart your spring garden project with confidence.
2. When is the best time to start preparing my garden for spring?
Spring garden preparation should ideally begin in late winter or early spring, depending on your location and climate. The exact timing can vary, but a good rule of thumb is to start when the soil is workable and the threat of frost has passed. This typically means late February to early April for most regions. During this time, you can focus on tasks like cleaning up debris, pruning, and starting seeds indoors. By beginning early, you’ll have a head start on a vibrant and healthy garden once spring arrives.
3. What are some essential tools and equipment for spring garden preparation?
To prepare your garden for spring, you’ll need a few key tools and equipment. These include a good pair of pruners, garden gloves, a rake, a shovel, a wheelbarrow, and a soil testing kit. Additionally, having compost or organic mulch, as well as the appropriate seeds or plants for your garden, is essential. Investing in these tools and materials will help make your garden preparation more efficient and effective.
4. What should I consider when choosing plants for my spring garden?
When selecting plants for your spring garden, it’s essential to consider your climate, soil type, and available space. Research which plants are well-suited to your region’s growing conditions and the specific needs of your garden. Additionally, think about the color scheme, height, and bloom times of the plants you choose to create a visually appealing and harmonious garden. Native plants are often a wise choice, as they are adapted to local conditions and support local wildlife.
5. How can I protect my garden from late spring frosts or unexpected temperature drops?
Late spring frosts can be a concern for gardeners, potentially damaging tender new growth. To protect your garden, keep an eye on weather forecasts and be prepared to cover plants with blankets, row covers, or frost cloths when frost is predicted. Watering your garden in the evening can also help retain heat in the soil, offering some protection. Additionally, selecting frost-resistant plant varieties and planting in raised beds or well-draining soil can reduce the risk of frost damage in your spring garden.
Published: 27.04.2023