Muscari bulbs, also known as grape hyacinths, are cherished for their charming, fragrant flowers that light up gardens in early spring. These resilient bulbs are straightforward to plant and, with proper care, can naturalize and return year after year, creating vibrant clusters of blue, white, or purple blooms. Whether you’re an experienced gardener or a novice, Muscari bulbs are an excellent choice to brighten your outdoor space. This guide covers everything you need to know about planting Muscari bulbs and setting them up for success. Our gardening blog is a perfect place to find all the information you need!
Understanding Muscari Bulbs

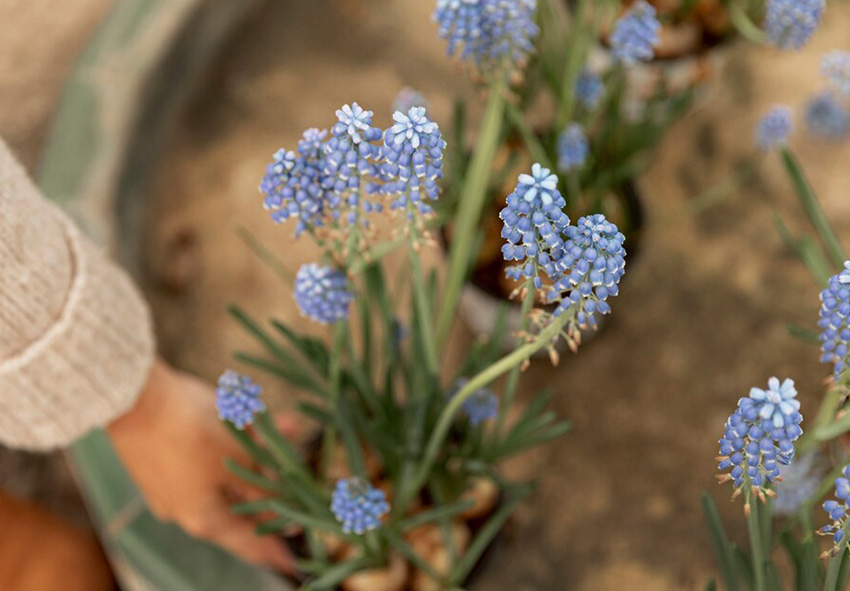
Muscari bulbs are small but mighty, producing clusters of tiny, bell-shaped flowers that resemble miniature grapes—hence their nickname, grape hyacinths. Native to regions in Europe and Asia, these hardy bulbs are prized for their ability to thrive in various conditions, making them an ideal addition to borders, rock gardens, or naturalized areas.
What sets Muscari bulbs apart is their low maintenance and adaptability. They require minimal effort to flourish, making them perfect for gardeners of all skill levels. With proper care, Muscari bulbs will multiply over time, creating an even more striking display. Their delightful fragrance and vibrant colors also attract pollinators, adding life and movement to your garden.
Preparing for Planting
Preparation is the foundation of a successful planting experience. Ensuring your Muscaris are planted in the right location, with well-prepared soil, helps prevent common issues such as rot, poor growth, or weak blooms. A little time spent getting ready will yield a spectacular payoff in spring when these charming flowers come to life.
Choosing the Right Location
Finding the ideal location for your Muscari bulbs is essential for their growth and vibrant blooms. These bulbs flourish in sunny areas that receive ample light, with at least 4–6 hours of sunlight each day. While they can tolerate some shade, full sun will help them bloom at their best. Equally important is ensuring the soil has excellent drainage, as waterlogged conditions can cause the bulbs to rot. By choosing a well-lit and well-drained spot in your garden, you’ll create the perfect environment for these resilient plants to thrive.
Preparing the Soil for Planting
Healthy soil is key to encouraging Muscari bulbs to thrive. Preparing the soil involves a few simple steps:
- Loosen the Soil: Dig to a depth of at least 6 inches to break up compacted soil and remove any debris, such as rocks or weeds, that might impede root growth.
- Add Organic Matter: Enrich the soil with compost or well-rotted manure. This boosts fertility and enhances the soil’s structure, helping the bulbs establish quickly.
- Test Drainage: Poor drainage can lead to bulb rot. Before planting, pour water into the hole; if it doesn’t drain within a few minutes, mix in coarse sand or grit to improve drainage.
Proper soil preparation ensures that your bulbs have access to the nutrients and aeration they need to grow strong and healthy.
Planting Depth and Spacing

The depth and spacing of your Muscari bulbs are critical to their overall success. Planting the bulbs at the right depth, typically around 3-4 inches, protects them from extreme weather while fostering strong root development. Proper spacing is equally important; placing bulbs about 2-3 inches apart allows them to grow comfortably, whether you prefer a dense carpet of blooms or a more naturalized arrangement. Taking care to plant at the correct depth and spacing will ensure your bulbs have the room and support they need to flourish.
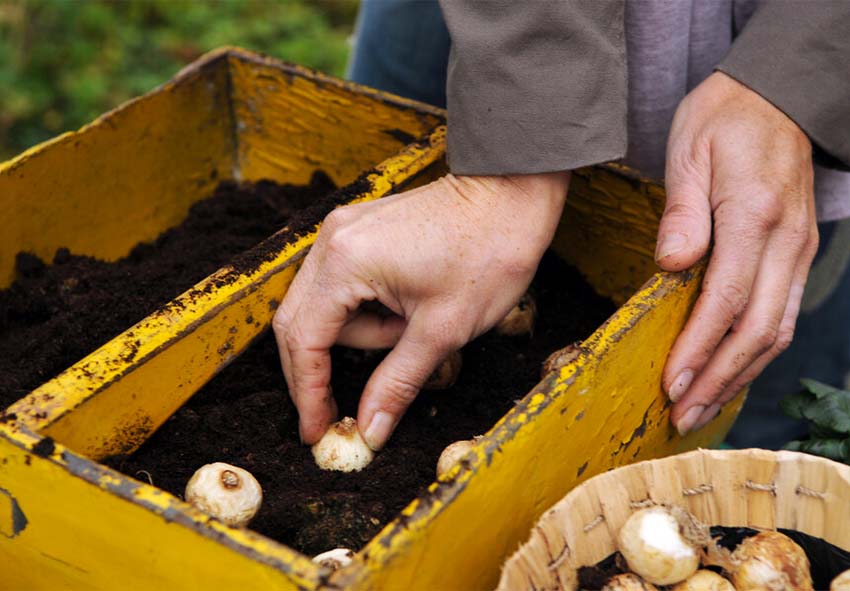
When planting, make sure the pointed end of the bulb is facing upward, as this is where the flower shoot emerges. Once planted, cover the bulbs with soil, press gently to eliminate air pockets, and water thoroughly.
Best Time to Plant Muscari Bulbs
Timing is crucial when planting Muscari bulbs. Planting them at the right time ensures they establish roots before winter and bloom beautifully in spring. The best time to plant them is in the fall, ideally six to eight weeks before the ground freezes. This gives the bulbs time to establish their roots before winter arrives. In regions with milder climates where the soil doesn’t freeze, planting can extend into early winter. Planting during these windows ensures the bulbs undergo a necessary chilling period, setting the stage for vibrant spring blooms.
Step-by-Step Planting Guide
Planting Muscari bulbs is a straightforward and enjoyable process. By following these detailed steps, you can ensure a beautiful display of blooms in the spring:
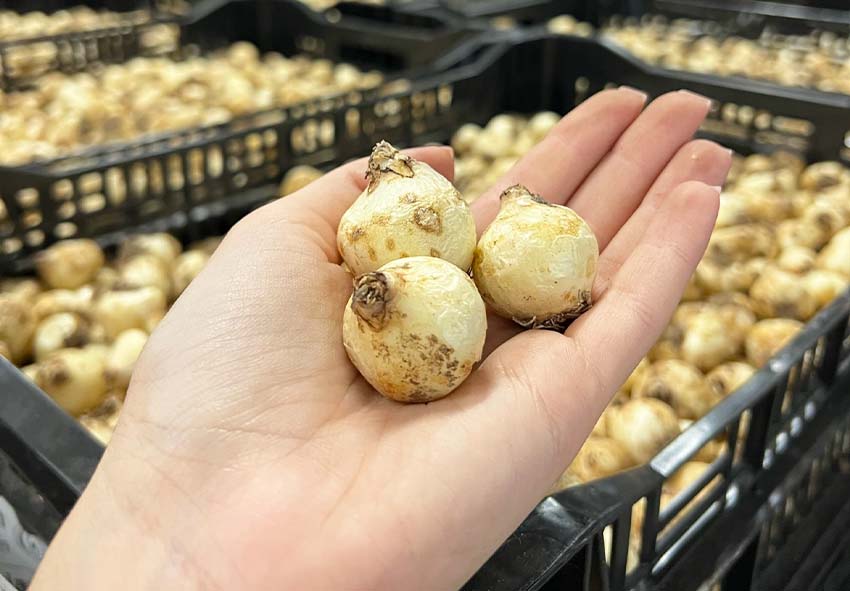
- Select Healthy Bulbs: Begin by choosing firm, plump bulbs that are free from any signs of rot, mold, or damage. Healthy bulbs are crucial for successful growth and blooming. If you’re storing bulbs before planting, keep them in a cool, dry place away from direct sunlight or humidity to maintain their vitality.
- Mark the Planting Area: Before digging, outline the planting area using string, garden markers, or a small trowel. This step is particularly useful when creating patterns or dense clusters for a uniform look. Marking ensures that you achieve your desired design and avoid uneven spacing.
- Dig Planting Trenches: For efficiency, especially when planting in large numbers, dig a trench rather than individual holes. A trench allows for faster planting and helps you maintain consistent depth and spacing. Ensure the trench is wide enough to accommodate multiple bulbs without crowding them.
- Plant in Groups for Impact: To create a dramatic visual effect, plant Muscari bulbs in clusters or drifts rather than in a single straight line. This mimics their natural growth patterns and results in a fuller, more organic look. Avoid over-spacing, as closely planted bulbs will produce a more vibrant, carpet-like display.
- Cover and Water: Once the bulbs are in place, cover them with soil and press gently to remove any air pockets, which can prevent proper root development. After covering, water the area generously to help the soil settle around the bulbs and encourage root establishment. Consistent moisture during the first few weeks is crucial, so check the soil periodically to ensure it doesn’t dry out.
- Mulch (Optional): In regions with cold winters, apply a layer of mulch over the planted area to insulate the soil and protect the bulbs from extreme temperature drops. Straw, bark chips, or shredded leaves work well as mulch materials. This layer also helps retain soil moisture and suppresses weed growth, providing an additional benefit for your garden. When spring arrives, you can gently remove the mulch to allow the shoots to emerge easily.
By carefully following these steps, you’ll create the ideal conditions for your Muscari bulbs to thrive and produce a stunning floral display in your garden.
Troubleshooting Planting Issues

If your Muscari bulbs fail to thrive, it can be frustrating, but most problems can be traced back to a few common issues. Addressing these challenges early will help you achieve a vibrant and healthy garden. By diagnosing and addressing these common problems, you can give your Muscari bulbs the best possible chance to thrive and reward you with a stunning springtime display.
Improper Planting Depth
One of the most frequent reasons for poor growth is planting the bulbs at the wrong depth. Bulbs planted too shallowly are more likely to dry out, as they’re exposed to wind and sun. They’re also more vulnerable to temperature fluctuations, which can prevent them from establishing roots properly. To avoid these problems, plant your bulbs at the recommended depth of 3–4 inches, which provides insulation and helps them stay moist and stable.
Poor Drainage
Muscari bulbs are particularly sensitive to overly wet conditions. If your soil retains too much water, it can cause the bulbs to rot before they have a chance to sprout. Signs of poor drainage include standing water or persistently soggy soil after rainfall. If you notice these issues, consider relocating the bulbs to a better-drained area. Alternatively, you can amend the existing soil by incorporating sand, grit, or organic matter like compost to improve drainage and aeration.
Unhealthy Bulbs
The quality of the bulbs you plant is a critical factor in their success. Bulbs that are soft, moldy, or damaged are unlikely to sprout and may spread disease to nearby healthy plants. Always inspect your bulbs before planting and discard any that appear compromised. Store unplanted bulbs in a cool, dry place, away from humidity and pests, to keep them in prime condition until planting time.
Other Potential Issues
Beyond these primary concerns, environmental factors like pests or extreme weather can also impact your bulbs. Animals such as squirrels or voles may dig up newly planted bulbs, so consider using protective mesh or planting deterrents. Additionally, late planting or insufficient chilling periods can delay or hinder blooming. If you suspect this is the case, ensure you’re planting at the right time and providing the necessary conditions for growth.
Conclusion
Planting Muscari bulbs is an easy and rewarding way to add a burst of color and fragrance to your garden. By choosing the right location, preparing the soil, and planting at the correct depth and time, you’ll create a stunning spring display that’s sure to impress.
Ready to start planting? Visit our online store for premium Muscari bulbs and all the gardening essentials you need to bring your garden dreams to life.
Frequently Asked Questions (FAQs) about Planting Muscari Bulbs
1. When is the best time to plant Muscari bulbs?
The ideal time to plant Muscari bulbs is in the fall, about 6–8 weeks before the ground freezes. This timing allows the bulbs to establish strong roots before winter. In warmer climates where the ground doesn’t freeze, planting can extend into early winter for successful spring blooms.
2. Can Muscari bulbs grow in pots or containers?
Yes, Muscari bulbs can thrive in pots or containers. Use a well-draining potting mix and ensure the container has drainage holes to prevent waterlogging. Plant the bulbs at the same depth as in the ground, 3–4 inches, and keep the soil moist but not soggy. Position the container in a sunny location for optimal growth.
3. Can I order Muscari bulbs from your online store?
Yes, you can order Muscari bulbs from our online store Dutch-bulbs.com. We offer a wide selection of Muscari varieties in various colors, making it easy for you to choose the ones that suit your garden’s aesthetic. Simply browse our selection, place your order, and have these enchanting flowers delivered to your doorstep.
4. Do Muscari bulbs require special care after planting?
Muscari bulbs are low-maintenance but benefit from occasional care. Water them after planting to settle the soil and promote root growth. During the growing season, keep the soil moist and apply a light layer of compost in early spring for added nutrients. Once the foliage dies back, allow the bulbs to rest undisturbed.
5. Can Muscari bulbs be planted with other flowers?
Absolutely! Muscari bulbs pair beautifully with other spring flowers like tulips, daffodils, and crocuses. Their compact size and vivid blue or purple blooms complement taller flowers, creating a layered effect. Be sure to plant them with other bulbs that have similar sunlight and soil requirements for the best results.
Published: 19.11.2024
