Cultivating daylilies can be a rewarding and enjoyable gardening experience. Daylilies are known for their vibrant and colorful flowers, and they are relatively easy to grow.
| Name | Blooming Period | Colors | Hardy | Edible | Propagation |
| Hemerocallis (Daylily) Spacecoast White | Summer | White | Yes | No | Division |
| Hemerocallis (Daylily) Schnickel Fritz | Early Summer | Pink | Yes | No | Division |
| Hemerocallis (Daylily) Wild Horses | Mid Summer | Purple | Yes | No | Division |
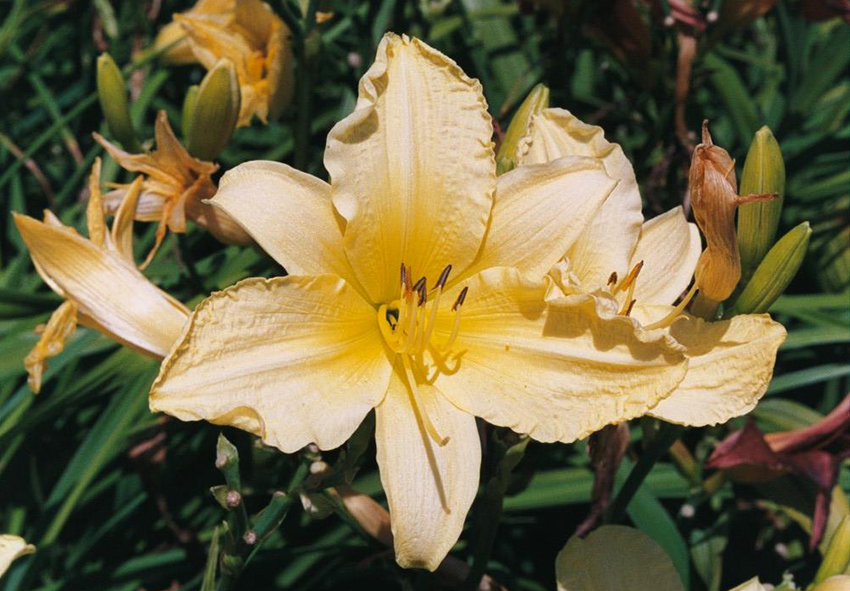
| Hemerocallis (Daylily) Antique Linen | Late Summer | Yellow | Yes | No | Division |
| Hemerocallis (Daylily) Night Embers | Summer | Red | Yes | No | Division |
| Hemerocallis (Daylily) Tiger Blood | Mid Summer | Orange | Yes | No | Division |
| Hemerocallis (Daylily) Excellent | Early Summer | Yellow | Yes | No | Division |
Embark on a Journey of Daylily Delights: Exploring the Diverse World of Petal Poetry
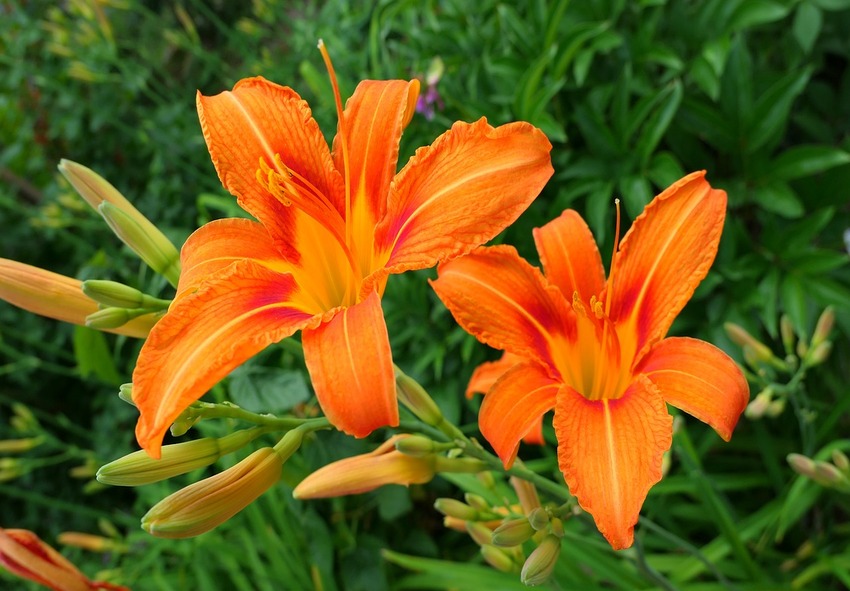
When it comes to daylilies, the options are limitless. These dynamic blooms offer an array of colors, forms, and dimensions, making them an ideal choice for enhancing any garden. Whether you prefer the timeless yellow and orange tones or the more unconventional hues of blue and purple, daylilies present a wonderful chance to showcase your artistic flair and explore innovative approaches to landscaping.
Decoding the Daylily Tapestry: Unraveling the Types and Traits That Make Each Blossom Unique
Daylilies are beautiful and versatile flowering plants that come in a wide range of colors, shapes, and sizes. The term “Daylily Tapestry” refers to the intricate and diverse collection of daylily cultivars available to gardeners and enthusiasts. Each daylily blossom is unique, exhibiting various types and traits that contribute to its individuality. Let’s unravel some of the key aspects that make each daylily blossom special.
- Color: Daylilies showcase an incredible spectrum of colors, including shades of red, orange, yellow, pink, purple, and even near-white. Some cultivars display a single solid color, while others exhibit various combinations, patterns, and gradients. The color of a daylily blossom is one of the most striking and noticeable traits.
- Form: Daylily blooms exhibit different forms, which include the shape and arrangement of petals. The most common form is the “trumpet” or “open form,” where the petals spread widely, revealing the intricate throat pattern. Other forms include the “double” form, where additional petal layers create a fuller appearance, and the “spider” form, characterized by long, narrow petals that give a spidery or star-like shape.
- Size: Daylilies vary in size, ranging from petite miniatures to large and ruffled blossoms. The flower diameter typically ranges from around two to eight inches, although some exceptional cultivars can reach up to ten inches. The size of a daylily blossom influences its visual impact and can be an important consideration when planning garden layouts.
- Pattern and Markings: Many daylilies feature intricate patterns, markings, or contrasting colors on their petals. These patterns can take various forms, such as eye zones, watermarks, picotee edges, or ruffled edges. Eye zones are circular or triangular patterns around the throat of the flower, while watermarks resemble irregularly shaped color splashes.
- Fragrance: While not all daylilies possess a strong fragrance, some cultivars produce delightful scents. The fragrance can vary from sweet and subtle to intense and spicy. It adds an additional sensory dimension to the daylily tapestry and enhances the overall experience.
- Bloom Time: Daylilies have different bloom times, with some varieties flowering early in the season, while others bloom later. This characteristic is crucial for designing gardens with continuous or extended periods of blooming. By selecting daylily cultivars with varying bloom times, gardeners can enjoy a prolonged display of these captivating flowers.
- Reblooming: Some daylilies have the remarkable ability to rebloom, producing multiple flower stalks throughout the growing season. Reblooming daylilies often offer extended color and enjoyment in the garden, making them highly desirable for enthusiasts.
- Foliage: Although daylilies are primarily admired for their blossoms, their foliage also plays a role in their overall appeal. Some cultivars exhibit unique foliage characteristics, such as variegated or striped leaves, which add visual interest even when the plants are not in bloom.
By understanding and appreciating the diverse types and traits found within the Daylily Tapestry, gardeners and enthusiasts can create captivating displays, mix and match cultivars to suit their preferences, and enjoy the beauty and individuality of each daylily blossom.
Nurturing Daylilies: Secrets to Thriving Blooms, From Planting to Pruning
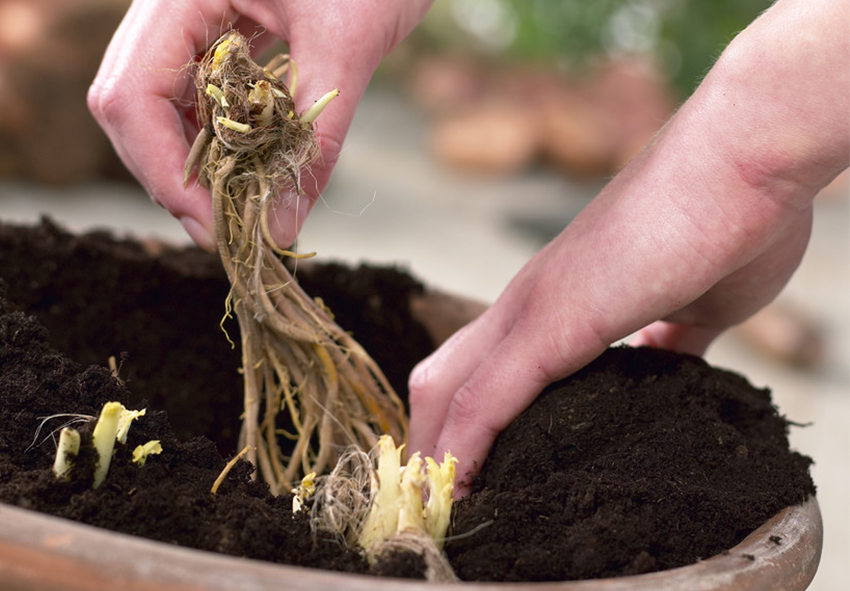
Daylilies are beautiful perennial flowers that are known for their vibrant blooms and hardy nature. Nurturing daylilies involves several key steps, from planting to pruning.
Planting Daylilies: Plant with Love, Watch Nature’s Masterpiece Unfold
Planting daylilies is a great way to add beauty and color to your garden. Daylilies are hardy, low-maintenance perennials that produce stunning flowers in a variety of colors and patterns.
Daylilies prefer a sunny or partially shaded spot in your garden. Ensure that the soil is well-draining to prevent waterlogging, as daylilies don’t like wet feet. Before planting, it’s important to prepare the soil properly. Remove any weeds or grass from the planting area and loosen the soil with a garden fork or tiller. Incorporate organic matter like compost or well-rotted manure to improve soil fertility and drainage.
Dig a hole that is wide and deep enough to accommodate the daylily roots. The hole should be large enough to spread the roots out comfortably without bending or crowding them. If your soil is heavy clay or lacks organic matter, you can add some compost or well-rotted manure to the bottom of the planting hole. This will help improve soil structure and provide nutrients for the daylilies.
Place the daylily plant in the hole, making sure the crown (where the roots meet the leaves) is level with or slightly above the soil surface. Backfill the hole with soil, gently firming it around the roots to remove any air pockets. After planting, water the daylily thoroughly to settle the soil and help the roots establish. Keep the soil evenly moist but not waterlogged during the first few weeks after planting.
A Symphony of Care: Harmonizing Daylilies’ Needs for Optimal Growth and Splendor
Caring for daylilies is relatively easy, and they are known for their hardiness and ability to thrive in a variety of conditions. Daylilies are relatively drought-tolerant once established, but they still require regular watering, especially during dry periods. Water deeply but infrequently, providing about an inch of water per week. Avoid overwatering, as it can lead to root rot.
Daylilies are not heavy feeders, but they benefit from a balanced fertilizer application in early spring as new growth emerges. Use a slow-release fertilizer or a balanced granular fertilizer following the package instructions. Avoid excessive nitrogen, as it can promote leaf growth at the expense of flowers.
To encourage continuous blooming, remove spent flowers by cutting the stem down to the base of the plant. This process is known as deadheading. It prevents the plant from using energy to produce seeds and redirects it towards producing more blooms. Daylilies tend to form clumps over time, and dividing them every few years helps rejuvenate the plants and maintain their vigor. Divide daylilies in early spring or fall, lifting the clumps, separating them into smaller sections with healthy roots and foliage, and replanting them.
Daylilies are generally resistant to pests and diseases. However, occasional problems can include aphids, slugs, snails, and spider mites. Regular inspection and prompt treatment with appropriate organic or chemical controls can help manage these issues.
Pruning Daylilies: Sculpting Your Floral Canvas with Expert Finesse
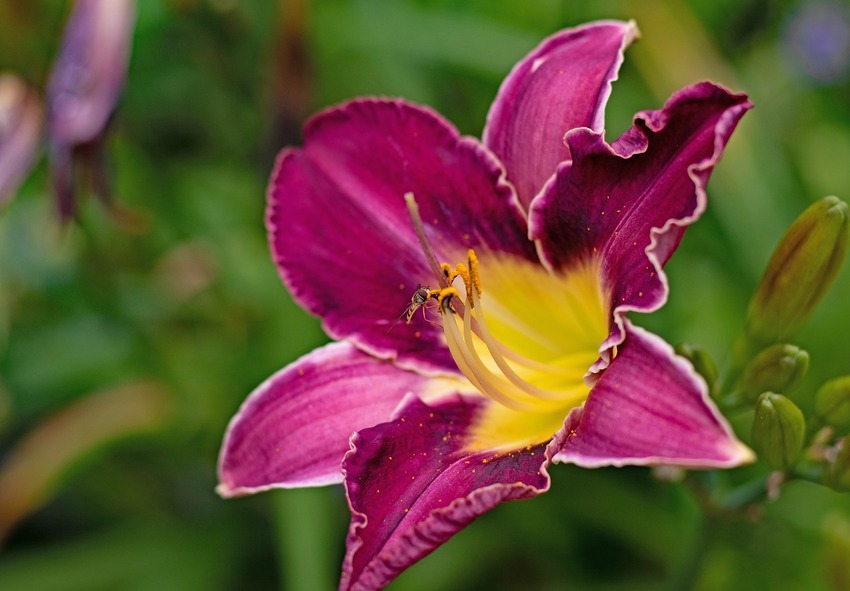
Pruning daylilies is a simple and effective way to maintain the health and appearance of these beautiful flowering plants. While daylilies generally require minimal pruning, there are a few instances where pruning can be beneficial. Here’s a guide on when and how to prune daylilies:
- Deadheading spent flowers: Deadheading is the process of removing faded or spent flowers. This practice encourages the plant to redirect its energy towards producing new blooms rather than setting seeds. Once a daylily flower has wilted and the petals have fallen off, you can snip off the flower stalk near its base using a clean pair of pruning shears. Be careful not to cut off the green foliage emerging from the center of the plant.
- Removing damaged or diseased foliage: If you notice any discolored, damaged, or diseased leaves on your daylilies, it’s advisable to remove them promptly. This helps prevent the spread of disease and improves the overall appearance of the plant. Use sharp pruning shears to cut the damaged foliage as close to the base as possible. Remember to disinfect your pruning tools between cuts, especially if you encounter diseased plants, to avoid spreading any potential infections.
- Trimming back in late summer or fall: Towards the end of the growing season, you can trim back the daylily foliage to tidy up the plants. This is typically done in late summer or early fall when the foliage starts to yellow and decline naturally. Cut the leaves back to a few inches above the ground, removing the majority of the plant’s spent foliage. This step helps prevent the accumulation of debris and reduces the risk of pest or disease issues over the winter.
It’s important to note that daylilies are resilient plants and can often thrive without extensive pruning. However, these simple pruning practices can enhance their performance and appearance. Additionally, routine maintenance tasks such as dividing overcrowded clumps every few years can also help rejuvenate daylilies and promote healthier growth.
Propagating Daylilies: Unleashing the Magic of Multiplication and Creation
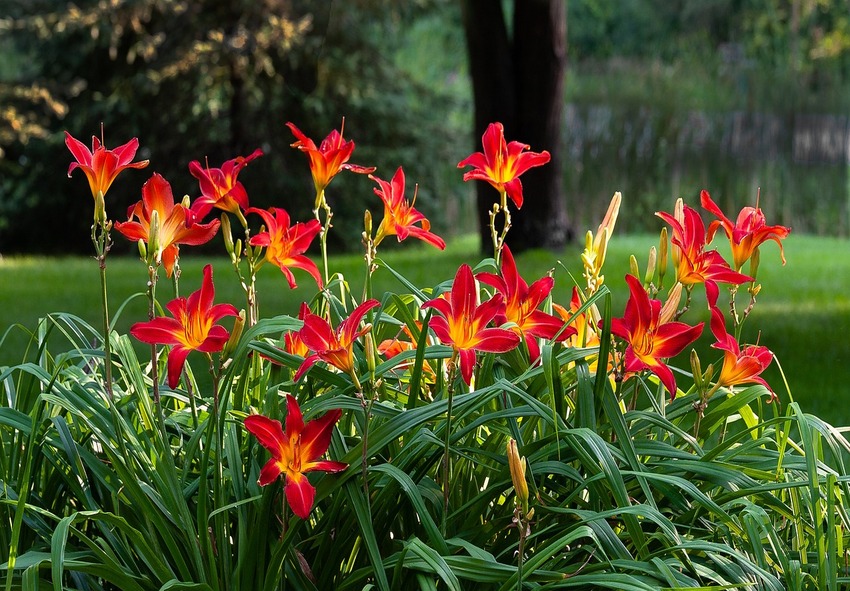
Propagating daylilies can be done through several methods, including division, seed sowing. Here’s an overview of each method:
1. Division: This is the most common and easiest way to propagate daylilies. It involves dividing an established clump of daylilies into smaller sections, each with its own set of roots and foliage. Here’s how you can do it:
- Start by selecting a mature, healthy daylily clump. The best time to divide daylilies is in early spring or late summer/early fall when the plant is not in active growth.
- Dig up the entire clump, being careful not to damage the roots.
- Gently separate the clump into smaller sections, ensuring that each division has a good number of roots and several healthy fans (foliage).
- Trim back the foliage to about 6 inches (15 cm) to reduce stress on the plant.
- Replant the divisions in well-prepared soil, spacing them apart according to the specific variety’s requirements.
- Water the newly divided daylilies thoroughly and keep the soil consistently moist until they become established.
2. Seed sowing: Daylilies can also be propagated from seeds, but keep in mind that the resulting plants may not resemble the parent plant, as daylilies are known for their hybridization and variations. Here’s what you can do:
- Collect ripe seed pods from your daylilies. The pods should be brown and dry.
- Remove the seeds from the pods and soak them in water for 24 hours to soften the seed coat.
- Fill seed trays or pots with a well-draining potting mix.
- Sow the seeds on the surface of the soil and lightly press them in, but do not cover them with soil, as they need light to germinate.
- Place the trays/pots in a warm location with indirect sunlight.
- Keep the soil consistently moist but not waterlogged.
- Seeds should germinate within a few weeks to a couple of months.
- Once the seedlings have developed a few sets of leaves, you can transplant them into individual pots or a prepared garden bed.
- It may take a few years for seed-grown daylilies to reach maturity and start blooming.
Remember, daylilies are generally hardy and adaptable plants, so they should respond well to propagation. However, it’s essential to provide the newly propagated plants with proper care, including adequate watering, sunlight, and soil nutrition, to ensure their successful establishment and growth.
Winter Wonders: Safeguarding Daylilies’ Beauty in the Frosty Embrace
Daylilies are hardy perennials, and most varieties can withstand cold temperatures. In regions with harsh winters, a layer of mulch applied around the base of the plants can provide some protection. Cut back the foliage to a few inches above the ground after the first frost.
Unveiling Nature’s Calendar: When Daylilies Blossom in All Their Glory
Daylilies typically showcase their blossoms during the summer season, although certain variations may exhibit earlier or later blooming patterns. The duration of the blooming period can span several weeks, contingent upon the specific daylily type and prevailing weather circumstances.
Essential Arsenal: Unveiling the Tools and Treasures for Daylily Care
Discovering the Essential Equipment and Valuables compiles an array of tools and resources vital for achieving triumph in daylily cultivation. This encompasses indispensable items like gardening gloves, pruning shears, a trowel, and a watering can, along with materials such as mulch, compost, and fertilizer. Equipped with these invaluable assets and employing proper care techniques, daylilies have the potential to flourish and grace any garden as the focal point.
From Soil to Sky: Unearthing the Perfect Ground for Daylilies’ Flourishing Dance
For daylilies to thrive, they rely on soil that promotes effective drainage, boasts abundant organic matter, and maintains a pH level ranging between 6.0 and 6.5. Conducting a soil test enables you to assess the soil’s pH level and nutrient composition, facilitating any required adjustments for optimal conditions.
Planting Paradise: Unraveling the Ideal Spots for Daylilies to Thrive and Shine
When choosing a location to plant daylilies, look for an area with partial to full sun exposure and protection from strong winds. Daylilies can also be planted in containers, making them a versatile addition to any garden or patio.
Nourishing Elixir: Crafting a Symphony of Growth with the Perfect Fertilizer Formula
To nourish daylilies effectively, it is recommended to utilize a well-balanced fertilizer like a 10-10-10 or 20-20-20 formula. This should be applied at intervals of four to six weeks throughout the growth period. Fertilization is ideally carried out in early spring and late summer, with caution exercised to avoid over-fertilization, as it can result in excessive foliage growth and diminished blooming.
Blossoming Dreams: Where to Find Daylilies’ Enchanting Beauty, Wherever You Are
Daylilies are available for purchase in various outlets, ranging from nurseries and garden centers to online retailers. When making a selection, it is important to take into account factors such as the desired plant size, preferred colors, and the specific flowering period. It is crucial to choose a daylily variety that aligns harmoniously with the climate and growing conditions of your location.
Frequently Asked Questions (FAQs) about Daylilies
1. What to do with daylilies when they stop blooming?
When daylilies stop blooming, there are a few things you can do. First, deadhead the spent blooms by removing the faded flowers to encourage new growth. Cut the flower stalk down to the base of the plant. Additionally, you can trim back the foliage after the blooming season to tidy up the plants. If you want to promote better blooming next season, consider dividing overcrowded clumps in early spring or late summer. This helps rejuvenate the plants and improve their overall health. Remember to provide adequate sunlight, water, and fertilization to ensure optimal growth and future blooms.
2. Should daylilies be cut back after blooming?
Yes, daylilies can benefit from being cut back after blooming. Removing spent flower stalks and trimming back the foliage can help tidy up the plant’s appearance and promote better overall growth. It is generally recommended to cut the flower stalks down to the base of the plant and trim back the foliage to about 6 inches above the ground. However, make sure not to remove too much foliage as it helps the plant gather energy for future growth. Regular deadheading and pruning can encourage the development of more blooms and maintain the health of your daylilies.
3. When to plant daylilies?
Daylilies are best planted in the spring or fall when temperatures are moderate. It is recommended to avoid extreme heat or cold. A temperature range between 15 to 25 degrees Celsius is ideal for daylilies. This allows the plants to establish their root systems before the heat of summer or the frost of winter arrives. Ensure the soil is well-drained and the planting site receives at least six hours of direct sunlight daily. By planting daylilies at the right time and in optimal conditions, you can enjoy their vibrant blooms and hardy foliage.
4. When do daylilies bloom?
Daylilies typically bloom during the summer months, from late June to early August, depending on the variety and geographical location. These vibrant and hardy perennials produce a profusion of colorful flowers that last only for a day, hence the name “daylily.” With their diverse range of colors and shapes, daylilies are a popular choice in gardens, adding beauty and charm to any landscape. Their blooming period provides a stunning display of blossoms, enhancing the summer garden with their captivating presence.
5. When to divide and transplant daylilies.
Divide and transplant daylilies in early spring or late summer when the temperature is between 10-25°C. Start by digging up the clump, then gently separate the individual plants, ensuring each division has healthy roots. Trim foliage to about 15 cm and replant in well-draining soil, spacing them 30-45 cm apart. Water thoroughly and mulch around the base to retain moisture. Regular watering and fertilization will help the transplants establish quickly.
Published: 05.07.2023
