Daylilies are cherished for their vibrant blooms and low-maintenance nature, bringing lasting beauty to gardens from late spring through summer. While daylilies are hardy and adaptable, providing thoughtful care throughout the year ensures they stay healthy, produce abundant flowers, and add color to your garden season after season. This guide covers seasonal maintenance tips for daylilies, from spring growth to winter dormancy, so you can enjoy a thriving daylily garden year-round. Our gardening blog is a perfect place to find all the information you need!
Spring Care for Daylilies

Spring is an essential season for daylilies, as this is when they begin their growth cycle and prepare for the flowering months ahead. Proper care in early spring sets the stage for vibrant blooms and healthy plants throughout the year. From clearing away winter debris to fertilizing and inspecting for pests, tending to your daylilies in spring helps them start strong and avoid common issues later in the season.
Cleaning Up and Inspecting Plants
As the weather warms, start by removing any remaining dead leaves, old mulch, or debris from around the base of your daylilies. This cleanup reduces the risk of pests and diseases that may have overwintered near the plants. Clearing away debris also promotes air circulation, which encourages healthy growth. Once the area is clear, inspect each plant for signs of pests or diseases, such as brown spots or leaf damage. Addressing these issues early can prevent problems later in the season.
Fertilizing for Growth
When new green growth emerges in early spring, it’s time to apply a balanced, slow-release fertilizer. Choose a fertilizer with a balanced nutrient ratio or one slightly higher in phosphorus, which supports root and flower development. Avoid high-nitrogen fertilizers in spring, as they can encourage excess foliage growth at the expense of blooms. Fertilizing early provides essential nutrients for strong roots, healthy foliage, and abundant blooms, setting up your daylilies for a vibrant flowering season. Find more useful information about it in our comprehensive guide for daylilies.
Watering Guidelines
As spring growth picks up, aim to keep the soil moderately moist. Here’s a consistent list of watering tips:
- Water Deeply During Dry Periods: Daylilies thrive with about an inch of water per week, especially during dry spells. Deep watering encourages stronger roots, so aim to soak the soil rather than just wetting the surface.
- Monitor Moisture Levels: Keep the soil consistently moist but not waterlogged, especially in spring as new growth emerges. Test soil moisture by checking about an inch below the surface; if it feels dry, it’s time to water.
- Adjust Watering in Summer Heat: During hot summer days, daylilies may need additional watering, particularly if they’re planted in sandy or well-drained soil. Morning watering helps prevent afternoon heat stress and reduces evaporation.
- Reduce Watering in Fall: As temperatures cool and growth slows, daylilies require less water. Gradually decrease watering in late fall to prepare the plants for dormancy over winter.
- Avoid Winter Watering: Daylilies are dormant in winter and don’t need regular watering. If it’s unusually dry, water only when the soil isn’t frozen, but generally, winter watering can be minimized to prevent rot.
Summer Care for Daylilies

Summer is the height of daylily bloom season, when their bright, colorful flowers bring beauty and interest to the garden. To help daylilies stay healthy and bloom continuously, they’ll need specific care such as regular watering, deadheading, and protection from pests. With a few simple maintenance tasks, you can enjoy abundant flowers and keep your daylilies looking their best throughout the hottest months of the year.
Deadheading for Extended Blooms
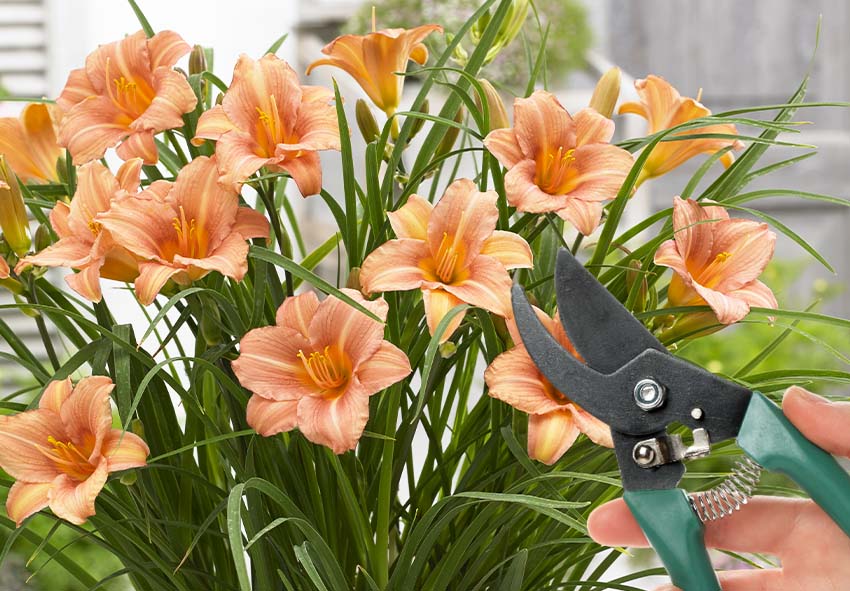
Removing spent flowers, known as deadheading, encourages daylilies to produce new blooms. Daylilies bloom on scapes, or flower stalks, which can continue producing flowers over time. Once a flower fades, remove it by snapping or cutting it off just below the base. When a scape has finished blooming completely, cut it back to the base of the plant to redirect energy toward developing new flowers.
Mulching and Watering
Mulching helps retain soil moisture and keeps roots cool during the hottest months. Apply a 2-3 inch layer of mulch around each plant, being careful not to cover the crown. This will reduce evaporation and help suppress weeds. During dry spells or heat waves, increase your watering to ensure the plants receive about an inch of water per week. Daylilies thrive with steady moisture and will look their best when kept well-hydrated during summer.
Monitoring for Pests and Diseases
Daylilies are generally resilient, but pests like aphids, spider mites, and thrips can occasionally become a problem. Here are some tips for you:
- Inspect Leaves and Stems Regularly: Check daylily leaves and stems weekly for signs of pests like aphids, spider mites, or thrips. Look for discolored spots, holes, or sticky residue, which may indicate an infestation.
- Watch for Signs of Rust and Leaf Streak: Rust and leaf streak are common fungal issues in daylilies. Rust appears as orange powder on leaves, while leaf streak shows as yellowing or brown streaks. Early detection allows for prompt treatment.
- Remove Infected Foliage: If you spot diseased or pest-damaged leaves, trim and remove them immediately to prevent spread. Dispose of infected plant material away from the garden to limit contamination.
- Encourage Beneficial Insects: Ladybugs, lacewings, and other beneficial insects can help control pest populations naturally. Avoid broad-spectrum insecticides to maintain a balanced garden ecosystem that supports these helpful insects.
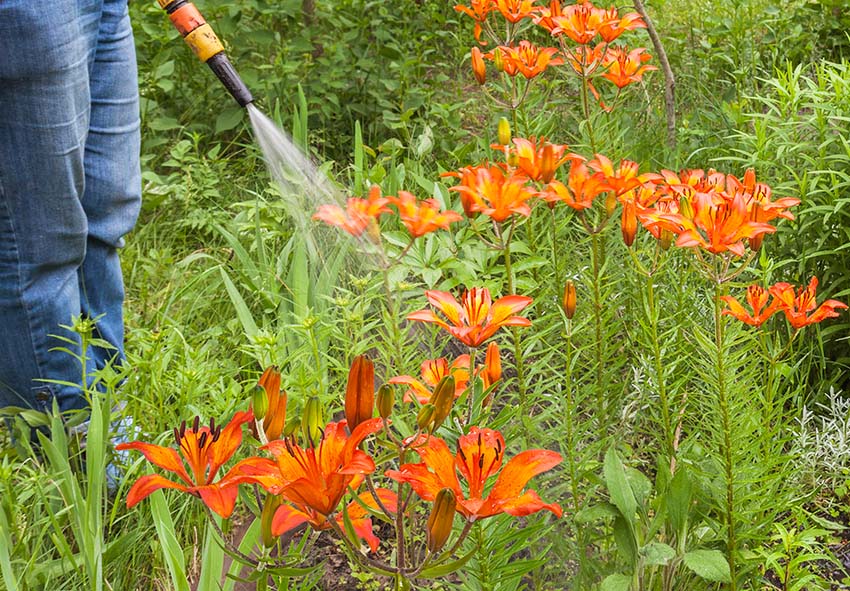
- Apply Targeted Treatments if Needed: Use insecticidal soap or neem oil sparingly if pests become a serious problem. Always apply treatments in the early morning or late evening to avoid sunburn on treated plants and to minimize disruption to pollinators.
Fall Care for Daylilies

Fall is a time to prepare your daylilies for the upcoming winter while also ensuring they’re well-positioned for strong growth in spring. In this season, you’ll focus on trimming back foliage, dividing overcrowded clumps, and possibly fertilizing to support root health. Fall care helps daylilies store energy in their roots, which is vital for both winter survival and a vigorous start when temperatures warm again.
Cutting Back and Cleaning Up
After blooming has finished and the foliage starts to die back, trim the leaves down to about 4-6 inches. This helps prevent pests and diseases from overwintering near the plants and also gives your garden a tidy appearance. However, avoid cutting back foliage that’s still green, as the plant is still absorbing nutrients to store in the roots for next season. This fall cleanup will help keep your daylilies healthy during dormancy.
Dividing Overgrown Clumps
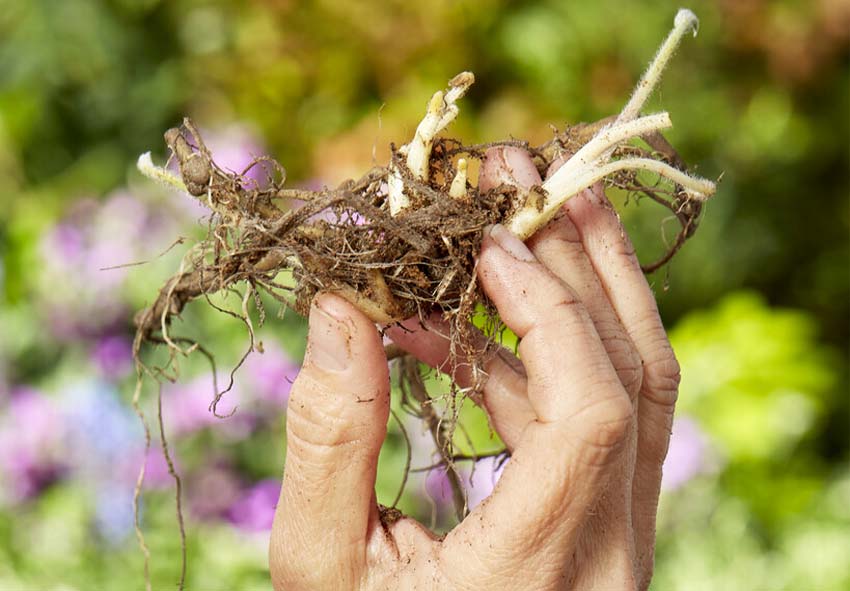
Daylilies naturally spread over time, which can lead to overcrowding and reduced flowering. Every few years, fall is a good time to divide these clumps. Start by digging up a mature clump of daylilies, being careful not to damage the roots. Separate the clump into smaller sections, each with at least three to five healthy fans (leaf clusters). Replant these divisions in well-prepared soil, and water them thoroughly. Dividing gives each plant more room to grow and encourages healthier blooms in future seasons.
Fertilizing for Winter Preparation
In late fall, consider applying a phosphorus-rich fertilizer around your daylilies. Follow this guidance:
- Choose a Phosphorus-Rich Fertilizer: Opt for a low-nitrogen, high-phosphorus fertilizer to support root health, which helps the plant store energy for spring growth. Look for formulas labeled “root-boosting” or “bloom-builder” to support next season’s blooms.
- Apply in Late Fall: Fertilize after the first frost, when daylilies start to enter dormancy. Applying in late fall allows nutrients to reach the roots without encouraging unnecessary foliage growth.
- Use a Slow-Release Formula: Slow-release fertilizers gradually provide nutrients over time, helping the roots absorb essential minerals throughout winter without causing quick, unneeded growth.
- Avoid Nitrogen-Heavy Fertilizers: Nitrogen promotes foliage growth, which isn’t ideal in fall or winter. Stick with low-nitrogen formulas to prevent tender new growth that could be damaged by winter frosts.
- Water Lightly After Application: After fertilizing, water the soil lightly to help nutrients reach the root zone, but avoid overwatering to prevent rot. This gentle watering will help the fertilizer penetrate while keeping the soil stable for winter dormancy.
Winter Care for Daylilies

Winter is a season of dormancy for daylilies, but they still benefit from some protection during the cold months. Mulching around the base, minimizing watering, and checking for frost heave are all simple steps that help your plants weather harsh winter conditions. By giving daylilies a little attention over winter, you’ll help them return strong and ready for spring growth.
Mulching for Winter Protection
Once the ground has frozen, apply a 2-3 inch layer of mulch around the daylilies. Mulch insulates the roots, helping to prevent damage from freeze-thaw cycles. Straw, shredded bark, or pine needles work well for winter insulation, especially in colder climates. Be sure not to bury the crown, as this can cause rot. Mulching keeps roots stable and minimizes temperature fluctuations that can stress the plant.
Minimizing Watering
During winter, daylilies enter a dormant period and require minimal watering. Overwatering during dormancy can lead to root rot or freezing damage in particularly cold regions. Only water your daylilies if the winter season is unusually dry and the soil is not frozen, which is unlikely in most climates.
Protecting Against Frost Heave
Frost heave is a common winter issue for daylilies in areas with frequent freeze-thaw cycles, as it can push roots up and expose them to damaging cold air. To prevent root damage and keep your daylilies protected, follow these steps to monitor and manage frost heave:
- Understand Frost Heave Risks: Frost heave occurs when frequent freeze-thaw cycles push daylily roots up out of the soil, exposing them to cold air. This can lead to root damage if left unaddressed.
- Regularly Inspect Plants During Winter: Especially in areas prone to freeze-thaw fluctuations, check your daylilies periodically throughout the winter. Look for any roots that may be pushed up and exposed by the changing temperatures.
- Press Exposed Roots Back into Soil: If you find exposed roots, gently press them back into the soil to keep them protected from the cold. This simple action can prevent potential root damage.
- Add Extra Mulch as Needed: After pressing the roots back down, apply a bit more mulch over the area. This extra insulation will help stabilize soil temperatures and prevent further frost heave.
- Monitor Mulch Thickness: Make sure your mulch layer remains consistent, especially after severe weather. A 2–3 inch layer of mulch is usually effective for keeping roots insulated and minimizing the effects of frost heave.
Conclusion
With year-round care, daylilies can thrive in almost any garden, rewarding you with resilient growth and colorful blooms season after season. By tending to these beautiful perennials in each season, you’ll ensure they remain healthy, vibrant, and prepared for whatever nature brings. Whether you’re cleaning up in spring, mulching for winter, or dividing in fall, these simple but effective practices will keep your daylilies flourishing and make them a stunning focal point in your garden. Explore our online store for all your garden care products, from fertilizers and mulches to pest control options, and enjoy the rewards of well-cared-for daylilies for years to come.
Frequently Asked Questions (FAQs) about Daylilies
1. How often should I water my daylilies throughout the year?
Daylilies generally need about an inch of water per week, especially during active growth in spring and summer. In cooler seasons, water sparingly, as overwatering can lead to root rot. During winter dormancy, water only if there’s a prolonged dry spell and the soil is unfrozen, as daylilies don’t require much moisture in winter.
2. When is the best time to fertilize daylilies?
Fertilize in early spring with a balanced, slow-release fertilizer as new growth begins to support foliage and flower development. Avoid high-nitrogen formulas to prevent excessive foliage growth. Apply a phosphorus-rich fertilizer in late fall to promote root health, but avoid nitrogen-heavy options before winter to discourage unneeded leaf growth.
3. How should I prune and deadhead my daylilies?
In summer, deadhead spent blooms to encourage additional flowering and maintain plant appearance. At the end of the season, trim back foliage to about 4–6 inches once it begins to die back naturally. Avoid heavy pruning in winter, as the remaining foliage helps the plant store energy for spring growth.
4. Can I order dutch daylilies from your online store?
Yes, you can order dutch daylilies from our online store Dutch-bulbs.com. We offer a variety of high-quality daylily bulbs, including dutch varieties, perfect for adding vibrant color to your garden. Visit our website to explore our selection and place your order for delivery directly to your door.
5. Should I divide daylilies, and if so, when is the best time?
Daylilies should be divided every 3–4 years, typically in the fall, after blooming has finished. Dividing helps prevent overcrowding, encouraging healthy growth and increased blooms in future seasons. Dig up the clump, gently separate sections, and replant with ample space between each plant to allow for new growth.
Published: 12.11.2024
