Peony Tulips: Care Guide for Flower
Peony tulips are a stunning variety of tulips known for their lush, double-layered petals that closely resemble peonies. Their large, ruffled blooms make them a standout choice for gardens, floral arrangements, and container planting. These tulips come in various colors, ranging from soft pastels to deep, rich hues, offering versatility for any landscape design.
One of the most appealing aspects of peony tulips is their long-lasting blooms, which often persist longer than standard tulips. They thrive in well-drained soil and prefer full sun to partial shade, making them relatively easy to grow. These flowers bloom in mid to late spring, adding a touch of elegance and romance to any outdoor space.
Peony tulips are excellent for cut flowers, bringing their exquisite beauty indoors. Whether planted in borders, flower beds, or pots, their dramatic and full appearance makes them a favorite among gardeners and floral enthusiasts alike. Our gardening blog is a perfect place to find all the information you need!
Why Choose Peony Tulips for Your Garden or Home?
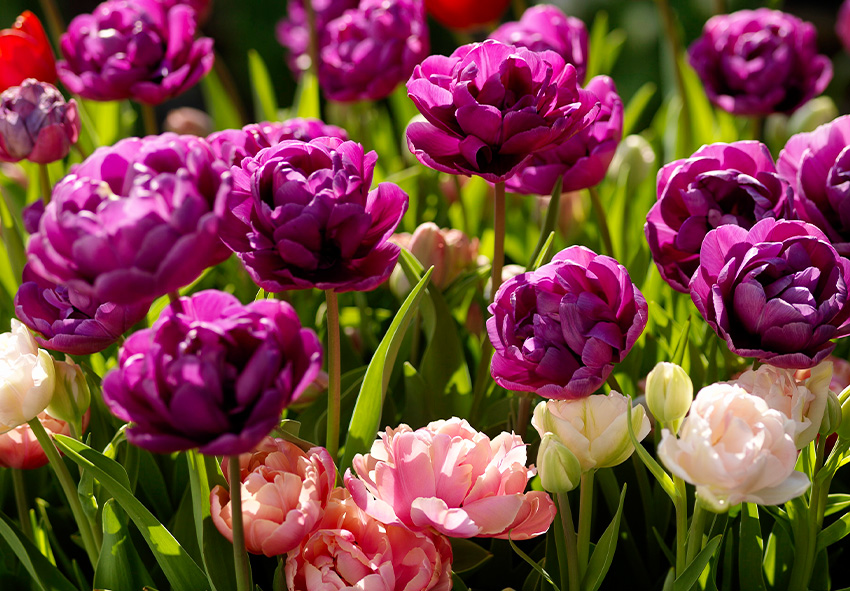
Peony tulips are an excellent choice for gardeners seeking flowers with a luxurious and elegant appearance. Their double blooms give them a full, rounded shape, similar to traditional peonies, but with the ease and simplicity of tulip care. This makes them a perfect option for those who love peonies but want the convenience of tulips.
Another significant advantage of peony tulips is their long-lasting display. Unlike standard tulips, which may have a shorter blooming period, peony tulips tend to remain vibrant for an extended time, making them a great choice for spring gardens. They thrive in containers as well, allowing gardeners with limited space to enjoy their beauty on patios or balconies.
In addition to their stunning looks, peony tulips are low-maintenance. They require well-drained soil, moderate watering, and plenty of sunlight to flourish. Their resilience to varying weather conditions also makes them a reliable addition to gardens.
Peony tulips also make breathtaking cut flowers. Their dense petals and unique shapes create luxurious floral arrangements that elevate any indoor space. Whether planted in flower beds, along pathways, or in decorative pots, these tulips add charm and sophistication, making them a must-have for flower lovers.
The Most Popular Peony Tulip Varieties and Their Characteristics
Peony tulips come in a variety of colors and styles, each offering a unique aesthetic to gardens and floral displays. Their full, double-layered petals make them a favorite among gardeners looking for a more dramatic tulip variety.
These tulips can be found in shades of pink, white, red, yellow, and even bi-colored varieties. Some varieties bloom early in the season, while others extend the tulip season with later flowering times. The different types of peony tulips allow for creative landscaping and floral designs.
Whether you prefer the romantic softness of pink varieties or the bold elegance of deep reds, peony tulips cater to diverse gardening preferences. Their ability to blend well with other spring flowers, such as daffodils and hyacinths, makes them an excellent choice for garden beds and arrangements.
Classic Pink Peony Tulips
Pink peony tulips bring a soft, romantic charm to gardens and floral arrangements. Some of the most popular varieties include:
- ‘Angelique’ – A highly sought-after variety with delicate, soft pink petals that resemble a peony in full bloom.
- ‘Foxtrot’ – A fragrant, early-blooming tulip with layers of pale pink petals tinged with deeper hues.
Pink peony tulips pair beautifully with white or purple flowers, creating an elegant and timeless garden display. They also make excellent cut flowers, adding a touch of romance to bouquets and centerpieces.
White and Cream Peony Tulips for an Elegant Look
For those who love a classic and refined aesthetic, white and cream peony tulips are an ideal choice. Popular varieties include:
- ‘Mount Tacoma’ – A lush, double-flowered tulip with pure white petals that exude sophistication.
- ‘Exotic Emperor’ – A striking tulip with creamy white petals and subtle green accents.
White peony tulips symbolize purity and grace, making them perfect for wedding bouquets and elegant garden designs. Their soft, glowing petals create a serene atmosphere in any outdoor space.
Red and Burgundy Peony Tulips for a Bold Statement
Deep red and burgundy peony tulips add drama and intensity to any floral display. Some standout varieties include:
- ‘Bombastic Red’ – A stunning tulip with deep red, fringed petals that create a fiery, dramatic effect.
- ‘Fairy Princess’ – A classic red peony tulip with a full, rich bloom.
These bold tulips make a striking contrast when planted alongside lighter-colored flowers, bringing a dramatic flair to gardens.
Striking Yellow and Bi-Colored Peony Tulips
For a bright and cheerful garden, yellow and bi-colored peony tulips are an excellent choice. Some notable varieties include:
- ‘Yellow Pomponette’ – A bright golden-yellow tulip with a lush, ruffled appearance.
- ‘Carnaval de Nice’ – A stunning bi-colored tulip with red and white striped petals.
These varieties bring vibrant energy to gardens and work beautifully in mixed floral arrangements.
How to Plant and Grow Peony Tulips Successfully
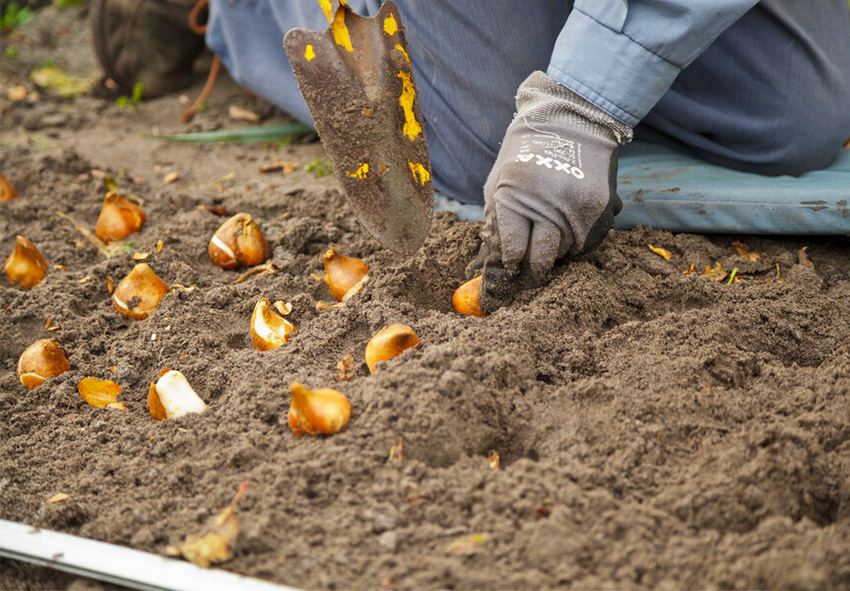
Peony tulips are a beautiful and unique variety of tulips known for their lush, double-layered petals that closely resemble peonies. To enjoy their spectacular blooms in spring, proper planting and care are essential. By selecting quality bulbs, choosing the right soil and location, and following best planting practices, you can ensure healthy growth and abundant flowers.
These tulips thrive in well-drained soil with plenty of sunlight and require adequate spacing for proper airflow. Watering correctly after planting helps establish strong roots while preventing rot. Protecting young shoots from late frosts and maintaining cool temperatures will further enhance their development.
With the right conditions, peony tulips will reward you with breathtaking, full-petaled flowers in mid to late spring. Whether grown in garden beds or containers, their elegant appearance makes them a favorite among gardeners looking to add sophistication and charm to their outdoor spaces.
Step-by-Step Guide to Planting Peony Tulips
Planting peony tulips correctly is essential for healthy growth and vibrant blooms. Start by selecting high-quality bulbs, preparing nutrient-rich, well-draining soil, and choosing a sunny location. Plant bulbs at the correct depth and spacing, water thoroughly after planting, and provide the right growing conditions to encourage strong, long-lasting flowers.
Step 1: Choosing Quality Peony Tulip Bulbs
Selecting high-quality bulbs is the first step in successfully growing peony tulips. Look for bulbs that are large, firm, and free of mold or soft spots. Healthy bulbs should have a dry, papery outer layer and feel heavy for their size.
Avoid bulbs that appear dried out, shriveled, or damaged, as these may struggle to sprout or produce weak flowers. When purchasing bulbs, buy from reputable nurseries or garden centers to ensure you’re getting the best quality.
For the most impressive blooms, choose bulbs with a circumference of at least 10-12 cm. Larger bulbs typically produce stronger stems and fuller flowers. If storing bulbs before planting, keep them in a cool, dry place to prevent early sprouting or rot.
By starting with premium bulbs, you give your peony tulips the best possible chance to thrive and produce stunning, lush blooms in the spring season.
Step 2: Choosing the Right Soil and Location
Peony tulips require well-draining soil to prevent bulb rot and ensure healthy growth. A loose, nutrient-rich soil with plenty of organic matter is ideal. If your garden has heavy clay soil, consider amending it with compost or sand to improve drainage.
Choose a planting location that receives at least six hours of direct sunlight per day. Peony tulips bloom best in full sun, but they can tolerate light afternoon shade. Avoid planting in low-lying areas where water may collect, as excessive moisture can cause bulbs to rot.
Raised flower beds or containers can also be great options, as they provide better control over soil conditions. Before planting, loosen the soil to about 12 inches deep and mix in compost or slow-release fertilizer to provide essential nutrients for strong root development and vibrant blooms.
Step 3: Proper Planting Depth and Spacing
Planting depth and spacing play a crucial role in the success of peony tulips. The bulbs should be planted 4-6 inches deep, with the pointed end facing upwards. Planting too shallowly can result in weak stems, while planting too deep may delay or prevent flowering.
For proper airflow and healthy growth, space the bulbs 4-5 inches apart. Crowded planting can increase the risk of fungal diseases and competition for nutrients. If planting in containers, ensure the pot has good drainage and enough space for root expansion.
After placing the bulbs at the correct depth, cover them with soil and gently press down to eliminate air pockets. Avoid compacting the soil too much, as peony tulip roots prefer a loose structure to grow efficiently. Proper depth and spacing will encourage strong, upright stems and lush, full blooms when spring arrives.
Step 4: Watering After Planting
Watering correctly is essential to establish healthy peony tulip roots. Immediately after planting, water the soil thoroughly to encourage root development. This initial watering helps settle the soil around the bulbs and provides the necessary moisture for early growth.
However, it’s crucial to avoid excessive watering, as too much moisture can lead to bulb rot. Peony tulips prefer soil that is moist but well-drained, so only water when the soil feels dry to the touch. During fall and winter, natural rainfall is usually sufficient, and additional watering may not be necessary.
If planting in a container, ensure proper drainage by using pots with drainage holes and well-draining potting mix. Overwatering can be particularly problematic in containers, so allow the soil to dry slightly between watering sessions. By providing just the right amount of moisture, you’ll support healthy root development and ensure a successful blooming season.
Step 5: Providing the Right Growing Conditions
To maximize growth and flowering, peony tulips need the right environmental conditions. One of the biggest challenges is protecting young shoots from late spring frosts, which can damage emerging growth. Applying a light layer of mulch (such as straw or shredded leaves) over the soil in late fall helps insulate the bulbs and regulate temperature fluctuations.
Peony tulips thrive in cool temperatures and require a period of winter chill to bloom properly. If you live in a warmer climate where winter temperatures rarely drop below 50°F (10°C), consider pre-chilling bulbs in the refrigerator for 6-8 weeks before planting.
Additionally, avoid excessive heat and humidity, as these conditions can weaken the stems and reduce flowering. With the right care, your peony tulips will grow strong, producing breathtaking, full-petaled blooms that bring elegance and charm to your garden.
Essential Peony Tulip Care Tips for Healthy Growth
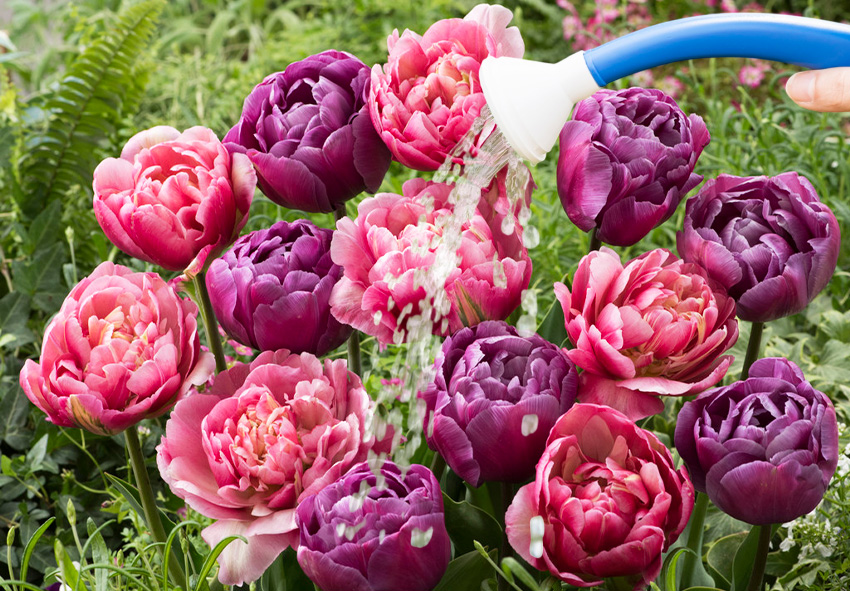
Peony tulips are prized for their lush, full-petaled blooms, but they require proper care to thrive year after year. Ensuring they receive adequate light, water, and nutrients will help maintain healthy growth and vibrant flowers.
These tulips prefer full sun, requiring at least six hours of direct sunlight per day. While they can tolerate light shade, too much shade may result in weak stems and fewer blooms. Soil conditions also play a key role—peony tulips thrive in well-draining, nutrient-rich soil with consistent moisture. However, overwatering can cause bulb rot, so it’s important to strike a balance.
Fertilizing at the right time and using the correct type of fertilizer will encourage strong stems and abundant flowering. Tall varieties may need plant supports to prevent bending, especially in windy areas. Proper post-bloom care, including deadheading and reducing water, helps bulbs store energy for the next growing season.
How to Care for Peony Tulips After Planting
Peony tulips require proper watering, fertilizing, and light conditions to produce spectacular blooms. Keep soil moist but not waterlogged, fertilize in early spring, and ensure plants receive plenty of sunlight. If needed, provide support for tall varieties and deadhead faded blooms. It’s important to know how to care for peony tulips properly, because good post-bloom care ensures strong growth for future seasons.
Step 1: Watering Peony Tulips the Right Way
Watering plays a crucial role in peony tulip growth. These tulips require moderate watering throughout the growing season, ensuring the soil remains evenly moist but never soggy. A good rule of thumb is to water once a week if rainfall is insufficient, providing about 1 inch of water per session.
As peony tulips start to bloom, continue watering consistently to support healthy flowers. However, once the blooming period ends and the leaves begin yellowing, gradually reduce watering. This signals that the plant is entering dormancy, and excess moisture at this stage can cause bulb rot.
For container-grown peony tulips, ensure proper drainage to prevent standing water. Using a well-draining potting mix can help maintain the right moisture balance. By adjusting watering habits according to the tulip’s growth cycle, you’ll promote stronger bulbs and ensure a successful blooming season the following year.
Step 2: Fertilizing for Strong Growth
Fertilizing peony tulips at the right time ensures strong, healthy blooms. Apply a balanced fertilizer with a ratio of 5-10-10 in early spring, just as shoots begin to emerge. This low-nitrogen formula promotes root and flower development without encouraging excessive leafy growth.
Avoid using fertilizers that are too high in nitrogen, as this can lead to weak stems and fewer blooms. Instead, opt for a slow-release bulb fertilizer or organic compost to provide long-lasting nutrients.
A second application of fertilizer after flowering can help bulbs store energy for the next season. Simply sprinkle a small amount of fertilizer around the base of the plant and water it in. For container-grown peony tulips, use a liquid fertilizer every two weeks during the active growing season for optimal results. Proper fertilization ensures lush, vibrant blooms and healthy bulbs for future growth.
Step 3: Providing Proper Light and Temperature
Peony tulips thrive in full sun, needing at least six hours of direct sunlight daily. While they can tolerate light shade, too much shade can result in weaker stems and fewer flowers. Planting in a south- or west-facing location ensures they receive the best light conditions.
Soil temperature is another key factor in peony tulip health. To keep soil cool and moist, apply a thin layer of mulch (such as shredded bark or compost) around the plants. This helps regulate temperature and prevents moisture loss, especially in warmer climates.
These tulips prefer cool spring temperatures and require a period of winter chill to bloom properly. If you live in a mild climate, pre-chill bulbs in the refrigerator for 6-8 weeks before planting. By maintaining the right balance of sunlight and temperature, you’ll encourage stronger growth and stunning flowers each spring.
Step 4: Supporting Tall Stems (If Needed)
Some peony tulip varieties produce tall, heavy blooms that can cause stems to bend, especially in windy conditions or after rain. To prevent this, use plant supports such as bamboo stakes, flower rings, or grow-through grids. These should be placed early in the season to support stems before they become too tall.
Another way to help peony tulips stay upright is by planting them in groups. Close planting allows the flowers to support each other naturally, reducing the risk of flopping.
After flowering, it’s essential to deadhead spent blooms by cutting off faded flowers at the base of the stem. This prevents the plant from wasting energy on seed production, allowing it to focus on storing nutrients in the bulb for next year’s blooms. By providing proper support and post-bloom care, you’ll ensure your peony tulips remain strong, healthy, and beautiful every season.
How to Encourage Your Peony Tulips to Bloom Again
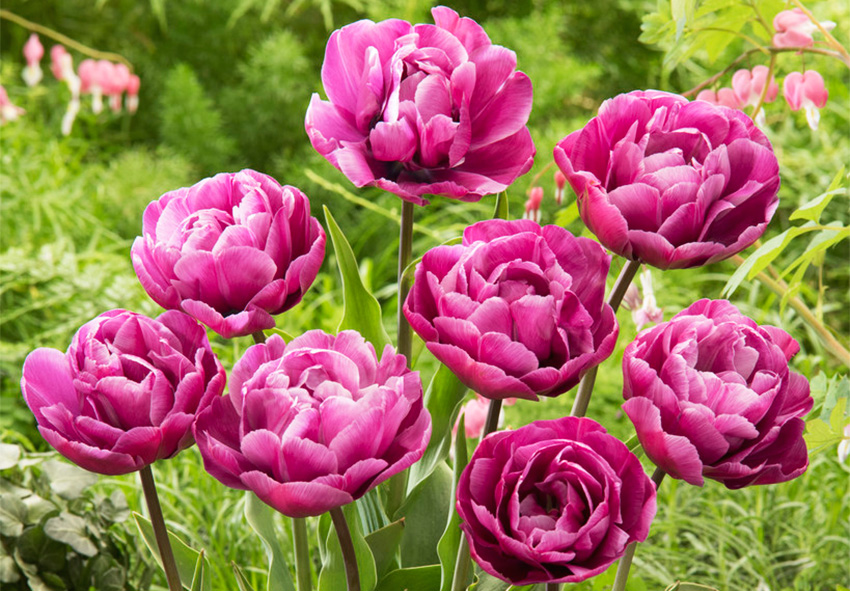
Peony tulips are stunning spring flowers, but they don’t always return reliably each year. Unlike perennial tulips, many peony tulip varieties act as annuals, meaning they may only bloom once unless given proper care. However, with the right post-bloom maintenance and bulb care, you can improve their chances of reblooming the following season.
To encourage regrowth, it’s essential to deadhead spent flowers, allow foliage to die back naturally, and store bulbs properly in warmer climates. In regions with mild winters, lifting and replanting bulbs each fall helps promote stronger blooms. Additionally, rotating planting locations reduces the risk of disease buildup, ensuring healthier plants year after year.
Following a step-by-step approach to post-bloom care, bulb storage, and replanting will maximize the lifespan of your peony tulips. With a little effort, you can enjoy their lush, full blooms season after season.
Step-by-Step Guide to Ensuring Reblooming
To encourage peony tulips to bloom again, proper post-bloom care is essential. Deadhead flowers after blooming, leave foliage intact until it yellows, and lift bulbs in warm climates for storage. Replant in fresh soil each fall and rotate locations to prevent disease buildup and ensure strong regrowth.
Step 1: Deadheading and Post-Bloom Care
After peony tulips finish blooming, remove spent flowers to prevent seed formation. Seed production drains energy from the bulb, making it less likely to bloom again next season. Use sharp scissors or pruners to cut off the faded blooms, but be sure to leave the foliage intact.
The leaves continue to absorb sunlight and store nutrients in the bulb, which is crucial for next year’s flowers. Only cut back foliage once it turns yellow and dies back naturally—this typically takes 6-8 weeks after blooming.
Avoid tying or braiding the leaves, as this can hinder photosynthesis. Instead, let them wither naturally, providing food for the bulb. If possible, add compost or a balanced bulb fertilizer after blooming to help bulbs regain strength. By following these steps, you’ll increase the chances of strong regrowth next year.
Step 2: Lifting and Storing Peony Tulip Bulbs
In warmer climates (zones 8-10), peony tulip bulbs often struggle to rebloom because they require a period of cold dormancy. If winters are too mild, lifting and storing bulbs after the foliage dies back can improve their chances of reblooming.
To lift bulbs, carefully dig around them using a garden fork or trowel, being cautious not to damage them. Shake off excess soil and allow bulbs to dry in a shaded, well-ventilated area for a few days. Once dry, store them in a cool, dry place (such as a basement or garage) in a paper bag or mesh sack to prevent mold and rot.
For best results, refrigerate bulbs for 6-8 weeks before replanting in fall. This mimics the cold period they naturally experience in colder regions and encourages strong flower formation in the next growing season.
Step 3: Replanting for Next Season’s Blooms
Replanting peony tulip bulbs each fall helps ensure consistent blooming year after year. Choose a fresh planting location with well-draining soil to prevent disease and bulb rot. Tulips should not be planted in the same spot year after year to reduce the risk of fungal infections like tulip fire or botrytis.
When replanting, set bulbs 4-6 inches deep with the pointed side facing up. Space them 4-5 inches apart to allow for proper airflow and root development. Adding compost or a slow-release bulb fertilizer at planting time provides essential nutrients for growth.
If you lifted and stored bulbs, you have to know how to care for peony tulips indoors. First of all ensure they receive a proper chilling period before replanting. In colder regions, this occurs naturally in the soil, but in warmer areas, pre-chilled bulbs should be planted as soon as the soil cools in fall.
By rotating planting locations and enriching the soil, you’ll encourage healthy growth and enjoy beautiful peony tulip blooms year after year.
Common Problems with Peony Tulips and How to Fix Them
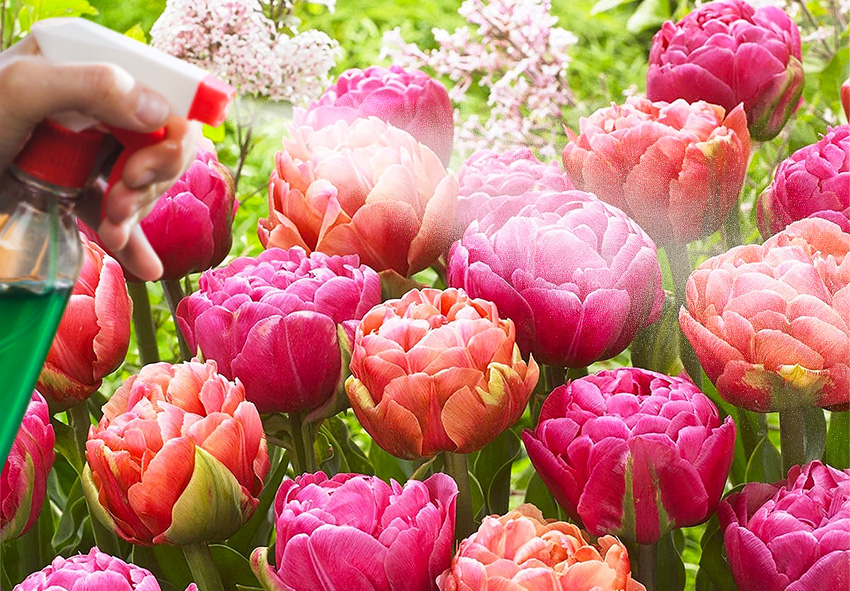
Peony tulips are stunning, but they can face issues like weak blooms, yellowing leaves, and falling stems. Addressing these problems early ensures healthier plants and more vibrant flowers.
One common problem is weak or no blooms, often caused by late planting, poor soil, or insufficient cold exposure. Peony tulips need 12-14 weeks of chilling to develop properly. To fix this, plant bulbs in well-draining soil during fall and, in warmer climates, pre-chill them in the refrigerator before planting.
Another issue is yellowing leaves or rotting bulbs, typically due to overwatering or heavy clay soil. Peony tulips prefer moist but not soggy conditions. To improve drainage, mix sand or compost into the soil and water only when needed. Remove any rotting bulbs to prevent disease spread.
Finally, tulips falling over can be a challenge because of their large, heavy blooms. This can be fixed by planting bulbs deeper (6 inches) for better anchoring, using low-growing companion plants for support, or installing plant stakes. Ensuring tulips get enough sunlight and proper spacing will also help keep their stems strong. With proper care, Peony tulips will flourish beautifully year after year.
Troubleshooting Guide
If your peony tulips are struggling, first determine the cause of the issue. Weak or no blooms often result from insufficient chilling periods or poor soil. Yellowing leaves indicate overwatering or drainage problems. If tulips are falling over, they may need deeper planting or additional support to hold up heavy flowers.
Issue 1: Weak or No Blooms
Cause:
- If your peony tulips fail to bloom, the likely reasons are planting too late, poor soil conditions, or lack of a cold period. Tulips require a chilling period of 12-14 weeks to trigger proper flowering. Without sufficient cold exposure, bulbs may produce weak or no blooms.
Solution:
- To ensure a strong bloom cycle, plant bulbs in fall (September to November) when soil temperatures cool to around 50°F (10°C). Choose nutrient-rich, well-draining soil to encourage healthy root development.
- In warm climates (zones 8-10), pre-chill bulbs in the refrigerator for at least 6-8 weeks before planting to simulate winter conditions.
- Avoid storing bulbs near fruit, as ethylene gas can damage them.
Issue 2: Yellowing Leaves or Rotting Bulbs
Cause:
- Peony tulips are prone to rot if grown in heavy, clay-based soil or if they receive too much water. Poor drainage causes bulbs to sit in moisture, leading to rot, fungal diseases, and premature yellowing of leaves.
Solution:
- To prevent rot, plant tulip bulbs in well-draining soil, preferably sandy or loamy. If your soil is heavy, mix in compost, perlite, or sand to improve aeration.
- When watering, only do so when the soil feels dry—overwatering can lead to root diseases.
If bulbs show signs of rot, remove them immediately to prevent further spread. For future plantings, consider raised beds or container gardening to better control soil conditions.
Issue 3: Tulips Falling Over
Cause:
- Peony tulip flowers are large and heavy, making them prone to flopping over—especially after rain or strong winds. Shallow planting or weak stems can exacerbate the issue.
Solution:
- To prevent tulips from falling over, plant bulbs at least 6 inches deep so roots establish a strong anchor.
- If your tulips are still flopping, consider using low-growing companion plants, such as pansies or ground cover, to provide natural support.
- Garden stakes or small peony cages can also be used for additional reinforcement.
Propagating Peony Tulips: Growing More Beautiful Blooms

If you want to multiply your Peony tulips, there are two primary methods: dividing offsets and growing from seeds. Each approach requires patience but results in stunning flowers for seasons to come.
The most effective propagation method is dividing tulip offsets. After Peony tulips finish blooming, smaller bulbs (offsets) develop around the main bulb. To propagate, dig up the bulbs in late summer once the foliage dies back. Carefully separate the offsets and store them in a cool, dry place until fall. Replant in nutrient-rich, well-draining soil, spacing them 4-6 inches apart. These offsets will usually bloom in 1-2 years.
Growing Peony tulips from seeds is a slower process but offers the excitement of developing unique new hybrids. Collect seeds from dried seed pods in late summer and plant them in light, well-draining soil. Keep them moist but not overwatered, and protect seedlings from harsh weather. However, seed-grown tulips take 3-7 years to produce blooms.
For the fastest results, dividing offsets is the preferred method, while growing from seeds is ideal for those interested in experimenting with new varieties. By propagating Peony tulips properly, you can enjoy even more of their lush, double blooms in your garden.
How to Propagate Peony Tulips Step-by-Step
The easiest way to propagate peony tulips is by dividing bulb offsets, which are small bulbs that naturally form around the main bulb. Alternatively, you can grow tulips from seeds, but this requires patience as it can take several years for the plants to bloom. Both methods require proper care of peony tulips and ideal conditions.
Step 1: Dividing Tulip Offsets (The Best Method)
Dividing tulip offsets is the most reliable method for propagating peony tulips. Tulip bulbs produce smaller baby bulbs (offsets) that can be separated and replanted to create new plants.
How to divide tulip offsets:
- Wait until late summer or early fall, after the tulip foliage has completely died back.
- Carefully dig up the main tulip bulbs without damaging the smaller offsets.
- Gently separate healthy offsets that have developed roots from the parent bulb.
- Store the offsets in a cool, dry place until fall planting.
- Replant in nutrient-rich, well-draining soil, placing the bulbs 4-6 inches deep.
With proper care, these offsets will mature into full-size peony tulip plants in 1-2 years.
Step 2: Growing Peony Tulips from Seeds
While less common, growing peony tulips from seeds allows for unique variations and hybridization. However, this method requires patience, as tulips grown from seeds can take 3-7 years to bloom.
How to grow tulips from seeds:
- Collect seeds from dried tulip seed pods in late summer.
- Sow seeds in shallow pots filled with well-draining, light soil.
- Keep the pots in a cold environment (such as outdoors or in a refrigerator) for 12-14 weeks to mimic winter conditions.
- Water lightly and maintain consistent moisture.
- Once seedlings emerge, provide bright but indirect light and keep temperatures stable.
After several years of growth, young tulip bulbs can be transplanted into the garden. Though this method takes time, it can result in stunning new tulip varieties.
Frequently Asked Questions (FAQs) about Peony Tulips
1. Can Peony Tulips be grown in pots indoors?
Yes, Peony Tulips grow beautifully in pots indoors if given proper care. Choose a deep container with drainage holes, fill it with well-draining soil, and plant the bulbs with the pointed side up. Chill the bulbs for 12–14 weeks in a cool, dark place (around 40°F/4°C) before moving them to a sunny window. Keep the soil lightly moist and rotate the pot for even growth and bloom.
2. When should I plant Peony Tulip bulbs for spring blooms?
Plant Peony Tulip bulbs in the fall, around 6–8 weeks before the ground freezes. This gives them time to establish roots before winter dormancy. In most climates, this means planting in late September through November. Proper chilling is essential—bulbs need a cold period of 12–14 weeks to trigger spring flowering. Plant 4–6 inches deep in well-drained soil and water thoroughly after planting.
3. How long do Peony Tulips bloom, and can they rebloom?
Peony Tulips typically bloom for 1–2 weeks in mid to late spring. While stunning, they’re generally grown as annuals since their double blooms are energy-intensive, and reblooming can be inconsistent. To encourage a second year of blooms, allow foliage to die back naturally, avoid cutting the leaves too early, and feed with bulb fertilizer after flowering. However, many gardeners replant new bulbs each fall for the best display.
4. Can I order peony tulip bulbs from your online store?
Yes, you can order peony tulip bulbs from our online store Dutch-bulbs.com. We offer a wide selection of tulip varieties suitable for different climates and preferences. Our bulbs are carefully sourced and stored to ensure they are of the highest quality. Shopping online provides you with convenience and access to valuable information about each tulip variety.
5. What should I do after Peony Tulips finish blooming?
After blooming, remove spent flowers (deadhead) to prevent seed production, which can drain the bulb’s energy. However, leave the foliage intact until it turns yellow and wilts naturally—this helps bulbs store nutrients for next season. In colder climates, you can leave the bulbs in the ground if the soil drains well. In warmer zones, consider lifting and storing the bulbs in a cool, dry place until fall.
Published: 17.03.2025
