Lilies: Care Guide for Flower
Lilies are among the most cherished flowering plants, celebrated for their large, trumpet-shaped blooms and sweet fragrance. These perennials are easy to grow and come in a wide range of colors, making them a stunning addition to both garden beds and container arrangements. With the right care, lilies will return year after year, producing even more blooms with time.
Lilies thrive in well-draining soil and prefer full sun to partial shade. Planting them in a location with good air circulation helps prevent fungal issues. Regular watering is essential, especially during active growth, but the soil should not stay soggy. Mulching around the base helps retain moisture and keeps roots cool. Tall varieties may require staking to support their heavy flowers. Removing spent blooms and allowing the foliage to die back naturally encourages energy storage in the bulb for the next growing season. With proper care, lilies offer lasting beauty throughout the summer. Our gardening blog is a perfect place to find all the information you need!
Why Choose Lilies for Your Garden or Home?

Lilies are a top choice for gardeners and flower enthusiasts because of their bold beauty, variety, and versatility. From towering Oriental and Asiatic varieties to compact dwarf types perfect for containers, lilies suit virtually every garden space or indoor setting. Their impressive range of colors—from pure white and deep red to orange, pink, and even bi-colored blooms—makes them ideal for mixing and matching with other plants or standing alone as dramatic focal points.
Beyond their visual appeal, lilies also offer a fragrant experience, especially Oriental lilies, which release a rich, sweet aroma that perfumes the garden or home. They’re also excellent cut flowers, often lasting over a week in vases, which adds value to every bloom. Easy to grow with minimal maintenance, lilies adapt well to most climates, as long as they are given proper sunlight, drainage, and protection from strong winds.
Choosing lilies means adding both elegance and resilience to your floral landscape. They attract pollinators such as bees and butterflies, contributing to a healthier garden ecosystem. Whether planted in beds, borders, or pots, lilies bring timeless charm and a powerful sensory presence to any setting, making them a favorite among novice and experienced gardeners alike.
The Most Popular Lily Varieties and Their Characteristics
Lilies come in a wide range of colors, shapes, and sizes, making them a versatile choice for gardens and floral arrangements. Here are some of the most popular varieties and their unique characteristics:
- Asiatic Lilies – These lilies are known for their vibrant colors, including red, yellow, orange, and pink. They have a mild fragrance and bloom early in the summer. Popular varieties include ‘Orange Pixie’ and ‘Grand Cru.’
- Oriental Lilies – These are among the most fragrant lilies, with large, exotic-looking blooms. They typically have white, pink, or red petals with speckled patterns. Varieties like ‘Stargazer’ and ‘Casablanca’ are garden favorites.
- Trumpet Lilies – With their elongated, trumpet-shaped flowers, these lilies have a strong fragrance and bloom in mid-to-late summer. ‘Regale’ and ‘Golden Splendor’ are well-loved choices.
- Tiger Lilies – Recognized for their orange petals covered in dark spots, Tiger Lilies are striking and easy to grow. They are hardy and return year after year.
- LA Hybrid Lilies – A cross between Asiatic and Longiflorum lilies, these hybrids offer large, bright flowers with a subtle fragrance. ‘Royal Sunset’ and ‘Brindisi’ are standout varieties.
Each variety brings unique beauty and appeal, making lilies an excellent addition to any garden.
Classic White and Cream Lilies
White and cream lilies add elegance and purity to any garden. These varieties are often used in weddings and formal arrangements due to their classic beauty:
- My Wedding – A stunning Oriental lily with large, pure white blooms and an intoxicating fragrance. It is perfect for cutting gardens and bouquets.
- Polar Star – A historic variety with trumpet-shaped white flowers and a golden-yellow center. It has a strong, sweet fragrance and thrives in well-drained soil.
- Easter Lily – Known for its association with spring and religious symbolism, this variety has large, fragrant white flowers and is commonly grown indoors in pots.
Vibrant Red and Orange Lilies for a Bold Statement
Red and orange lilies bring warmth and energy to gardens. Their fiery colors create eye-catching displays:
- Fire King – A bright orange Asiatic lily that blooms early in the summer. It is compact, making it ideal for containers and borders.
- Forever Susan – A striking bi-colored lily with deep burgundy-red petals and golden-orange tips. It stands out in mixed plantings.
- Red Velvet – A deep red, velvety-textured lily with recurved petals. It is a vigorous grower and adds drama to flower beds.
Pink and Purple Lilies for a Soft, Romantic Look
Pink and purple lilies provide a delicate and sophisticated touch to floral displays. These varieties are perfect for romantic settings:
- Stargazer Lily – One of the most famous Oriental lily, featuring deep pink petals with white edges and a powerful fragrance.
- Black Beauty – A dark maroon-purple lily with gracefully recurved petals. It thrives in gardens and attracts pollinators.
- Elodie – A soft pink, double-flowered lily with no pollen, making it ideal for allergy sufferers and indoor arrangements.
Exotic and Bi-Colored Lilies
Exotic and bi-colored lilies add intrigue with their unique color combinations and striking patterns:
- Must See – A captivating lily with golden-orange petals and bold red markings. It is a standout variety in any garden.
- Tiny Padhye – A compact, bi-colored Asiatic lily with deep purple centers that fade into white petal tips. It is excellent for containers.
- Scheherazade – A dramatic turk’s cap lily with red and gold petals that curl backward, revealing spotted interiors. It adds an exotic touch to landscapes.
How to Plant and Grow Lilies Successfully
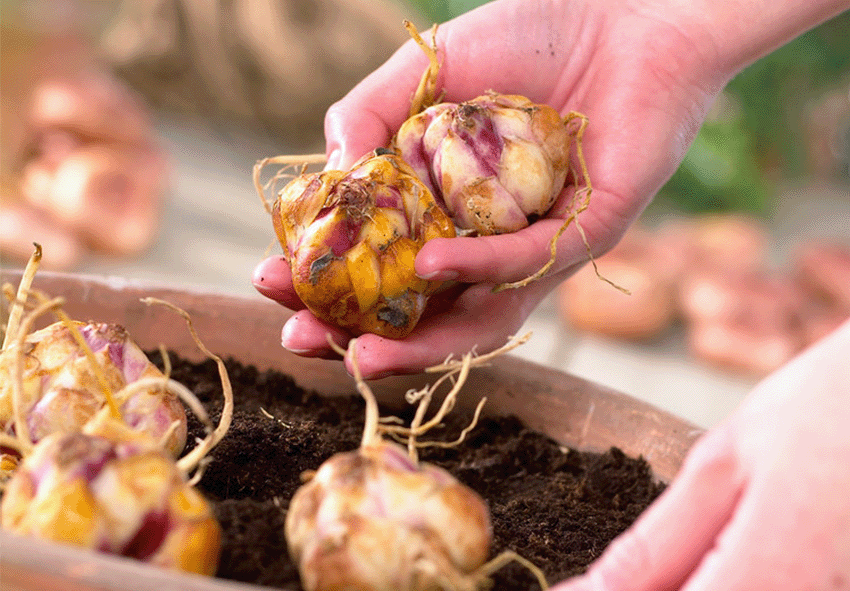
Lilies are a timeless favorite in gardens, known for their stunning blooms and delightful fragrance. Planting and growing lily successfully requires proper bulb selection, soil preparation, and ongoing care. With the right steps, you can enjoy vibrant lilies year after year.
Start by selecting high-quality lily bulbs that are firm and free from mold or soft spots. Avoid bulbs that are dried out or visibly damaged, as they may struggle to grow. Choosing the right soil and location is essential—lilies thrive in well-draining, slightly acidic soil (pH 6.0-6.5) and require at least six hours of direct sunlight per day for optimal blooming.
When planting, ensure bulbs are placed 6-8 inches deep to promote strong root growth and 8-12 inches apart for adequate airflow. After planting, water thoroughly to help the roots establish, keeping the soil moist but never waterlogged.
To maintain healthy lilies, protect young shoots from unexpected frosts or extreme heat. Applying a layer of mulch helps regulate soil temperature and retain moisture. With these steps, your lily will flourish, rewarding you with beautiful, long-lasting blooms each season.
Step-by-Step Guide to Planting Lilies
Planting lilies requires selecting high-quality bulbs, choosing the right soil and location, and providing proper lily bulb care. Begin with firm, mold-free bulbs, plant them in well-draining soil with full sun, and space them adequately. Water them well after planting and protect young shoots from extreme weather for optimal growth and blooming.
Step 1: Choosing Quality Lily Bulbs
Selecting the right bulbs is crucial for healthy lilies. Choose large, firm bulbs with no visible mold, soft spots, or signs of disease. Smaller or damaged bulbs may struggle to grow and produce weak flowers. Avoid dried-out bulbs, as they may not sprout properly.
When purchasing lily bulbs, look for varieties suited to your climate. Some lilies, like Asiatic and Oriental lilies, prefer cooler conditions, while trumpet lilies thrive in warmer areas. Store bulbs in a cool, dry place if not planting immediately.
Plant bulbs as soon as possible to prevent drying out and deterioration. Fresh, healthy bulbs will establish strong roots and provide stunning blooms in the growing season.
Step 2: Choosing the Right Soil and Location
Lilies thrive in well-draining, slightly acidic soil with a pH between 6.0 and 6.5. If your soil is heavy or clay-based, amend it with compost or sand to improve drainage. Avoid waterlogged areas, as excess moisture can cause bulb rot.
Select a planting location that receives at least six hours of direct sunlight daily. While some lilies tolerate partial shade, full sun encourages strong stems and abundant blooms. Consider planting lily near shrubs or perennials to provide some wind protection without blocking sunlight.
Raised garden beds or containers with proper drainage are excellent choices for growing lilies in poor soil conditions. Ensuring the right soil composition and location sets the foundation for healthy growth and vibrant flowers.
Step 3: Proper Planting Depth and Spacing
Plant lily bulbs at a depth of 6-8 inches to encourage strong root development and protect them from temperature fluctuations. In colder climates, planting slightly deeper helps insulate the bulbs from frost damage.
Space bulbs 8-12 inches apart to allow proper airflow and prevent overcrowding. This spacing ensures each plant receives adequate nutrients and reduces the risk of fungal diseases.
Position the bulbs with the pointed end facing upward. Cover them with soil, gently pressing it down to remove air pockets. Proper planting depth and spacing are essential for healthy root establishment and robust lily growth.
Step 4: Watering After Planting
Water lily bulbs thoroughly after planting to help roots establish quickly. Keep the soil consistently moist but not waterlogged, as excessive moisture can lead to bulb rot.
During dry periods, provide deep watering at least once a week, ensuring the moisture reaches the roots. Avoid overhead watering to prevent fungal diseases. Instead, water at the base of the plant.
A layer of mulch can help retain soil moisture and regulate temperature. Proper watering techniques will support healthy growth and abundant flowering.
Step 5: Providing the Right Growing Conditions
Protect young lily shoots from extreme weather conditions, such as late frosts or excessive heat. In cooler regions, cover emerging shoots with mulch or cloth during unexpected cold snaps.
Apply a 2-3 inch layer of mulch around the base of the plants to conserve moisture, suppress weeds, and moderate soil temperature. Organic mulches like bark or straw work best.
Lilies benefit from staking if they grow tall or are in windy areas. Supporting stems prevents breakage and ensures upright, beautiful blooms. Providing optimal growing conditions leads to healthy, thriving lilies year after year.
Essential Lily Care Tips for Healthy Growth
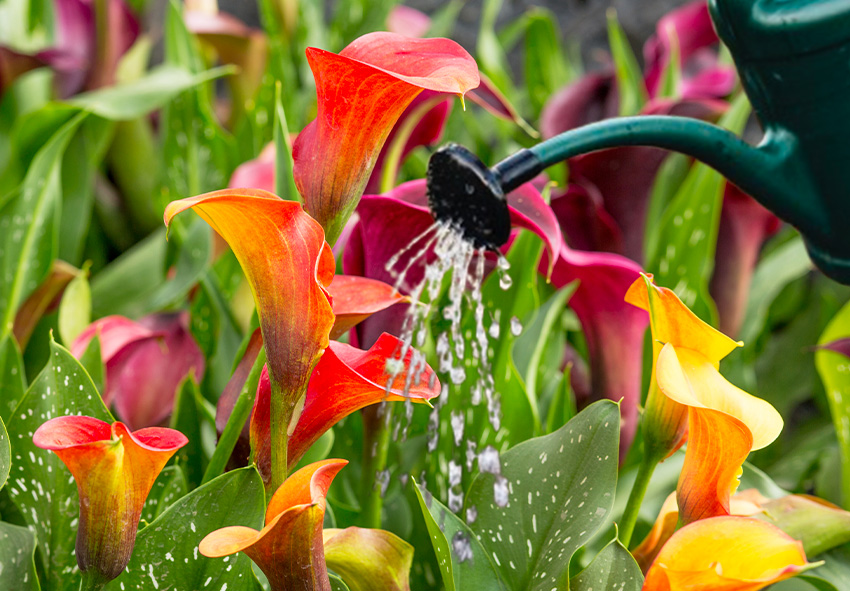
Lilies are elegant, hardy flowers that thrive with proper care. To ensure healthy growth, focus on their light, water, temperature, and feeding needs.
Lilies require consistent moisture but must not be overwatered. Deep watering once or twice a week is ideal, ensuring the soil remains moist but never soggy. Avoid wetting the leaves to prevent fungal diseases like botrytis. Well-draining soil is essential to prevent root rot.
Fertilizing lily supports strong stems and vibrant blooms. Use a balanced 10-10-10 fertilizer every few weeks during the growing season. Stop fertilizing after the flowers fade to allow bulbs to store energy for the next season.
Lilies thrive in full sun to partial shade, needing at least six hours of sunlight per day. Protect them from strong winds by planting near structures or using stakes for tall varieties.
To maintain long-lasting blooms, deadhead spent flowers promptly. This prevents the plant from diverting energy into seed production and encourages healthier bulbs.
In colder regions, apply mulch around the base of lilies to protect them from winter frost. Following these simple care tips will keep your lilies strong, healthy, and blooming beautifully year after year.
How to Care for Lilies After Planting
It’s important to know how to care for lilies in the garden just as to learn how to care for lilies indoors. Proper care after planting is crucial for a strong and healthy lily. Regular watering, balanced fertilization, and optimal sunlight exposure help lily thrive. Additionally, staking taller varieties and removing spent flowers will encourage continuous blooming. By maintaining suitable growing conditions, you can enjoy a stunning display of lilies throughout the season.
Step 1: Watering Lilies the Right Way
Water lilies consistently during their active growing period, ensuring the soil remains moist but not soggy. Deep watering encourages strong root development, helping plants withstand dry spells. It is best to water at the base of the plant, avoiding the leaves to reduce the risk of fungal diseases such as botrytis.
Lilies typically require about one inch of water per week, but this may vary depending on climate conditions. During hot or dry weather, increase watering frequency to prevent soil from drying out completely. Mulching around the base of lily helps retain moisture and regulate soil temperature.
Overwatering can lead to root rot, so ensure the planting site has well-draining soil. If growing lilium in containers, make sure there are drainage holes to prevent water accumulation. Proper watering techniques are essential to maintaining healthy and beautiful lilies throughout the growing season.
Step 2: Fertilizing for Strong Growth
Fertilization plays a crucial role in the health and growth of lilies. Applying a balanced fertilizer with equal parts nitrogen, phosphorus, and potassium (such as a 10-10-10 formula) every few weeks during the growing season will promote vigorous growth and abundant blooms.
Start fertilizing in early spring when new shoots emerge. Continue feeding every two to three weeks until the lilies finish blooming. Avoid over-fertilizing, as excessive nitrogen can lead to excessive foliage growth at the expense of flowers.
Once flowering ends, stop fertilizing to allow the bulbs to store energy for the next season. Removing spent flowers (deadheading) also helps redirect energy back into the bulb rather than seed production. If growing lilies in poor soil, consider supplementing with compost or organic matter to enhance fertility and sustain long-term plant health.
Step 3: Providing Proper Light and Temperature
Lilies thrive in locations with full sun to partial shade, requiring at least six hours of direct sunlight per day for optimal blooming. In extremely hot climates, providing some afternoon shade can help prevent heat stress.
Temperature fluctuations can impact growth, so aim to maintain a consistent environment. Lilies prefer moderate temperatures and should be protected from strong winds that may cause stem breakage. Applying mulch around the base helps stabilize soil temperatures and retain moisture, especially during summer.
During winter, some lily varieties require protection from harsh frost. Applying a layer of mulch or covering bulbs with straw can help insulate them against freezing conditions. Container-grown lilium should be moved to a sheltered area to prevent exposure to extreme cold. Proper light and temperature management will ensure your lilium remain healthy and produce stunning flowers season after season.
Step 4: Supporting Tall Lily Stems
Tall lily varieties, such as Oriental and trumpet lilies, often require support to prevent bending or breaking. Staking helps keep stems upright, especially during heavy rainfall or strong winds. Using plant stakes or small cages provides stability without damaging the delicate stems.
Place stakes early in the growing season to avoid disturbing the roots later. Tie stems loosely with garden twine to secure them to the stakes, allowing some flexibility for natural movement.
Deadheading spent blooms encourages prolonged flowering by redirecting energy back into the bulb rather than seed production. This process also improves the plant’s overall appearance. However, avoid cutting back foliage until it turns yellow, as leaves continue photosynthesis and help the bulb store nutrients for the next season.
With proper staking and maintenance, your tall lilies will stand strong and produce magnificent flowers, making them a striking addition to any garden landscape.
How to Encourage Your Lilies to Bloom Again
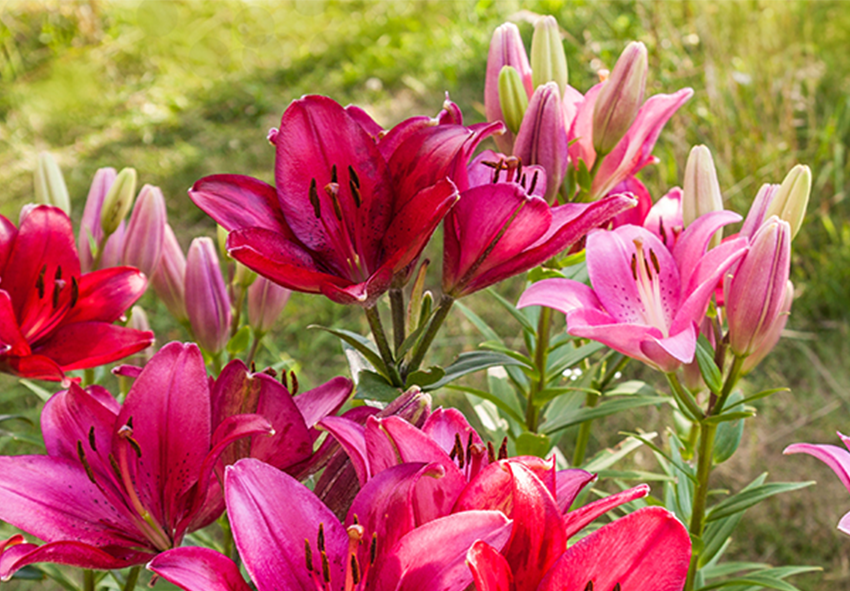
Encouraging your lilies to bloom year after year requires understanding their growth cycle and providing the right care. Lilies naturally bloom in the summer, but with the proper techniques, you can ensure a healthy blooming season each year.
First, make sure your lilies are receiving adequate sunlight. They thrive in full sun, ideally 6-8 hours a day. A lack of sunlight can lead to weak stems and fewer blooms. If your lilies aren’t blooming, consider relocating them to a sunnier spot in your garden.
Deadheading, or removing spent flowers, is another key practice to encourage more blooms. Once the flowers begin to fade, cut them back to the base to prevent energy from going into seed production. This redirects the plant’s energy back into the bulb, promoting stronger growth and more blooms.
Feeding your lilium is also essential for reblooming. Use a balanced fertilizer, especially one rich in phosphorus, which supports flower production. Apply it in early spring and again after the first bloom to encourage a second round of flowers.
Lastly, ensure that your lilies are not overcrowded. Bulbs need space to grow, so consider dividing them every few years to maintain optimal health and flowering. With the right care, your lilium will rewards you with stunning blooms year after year.
Step-by-Step Guide to Ensuring Reblooming
To encourage lilies to bloom again, focus on proper maintenance throughout the year. Deadhead spent flowers to prevent energy waste, prepare them for winter by protecting the bulbs, and divide overcrowded clumps periodically. By following these steps, you can keep your lilium healthy and ensure a continuous display of beautiful flowers.
Step 1: Deadheading and Post-Bloom Care
Deadheading is crucial to help lilies conserve energy for the next growing season. Remove spent flowers by cutting just below the bloom, but leave the stem and foliage intact. The leaves continue to photosynthesize, allowing the bulb to store nutrients for the following year’s growth. Avoid cutting back green foliage too soon, as this can weaken the plant. Once the leaves naturally turn yellow and dry out, they can be trimmed away. In addition, apply a balanced fertilizer after blooming to replenish lost nutrients. Proper deadheading and care will ensure that lilium remain strong and ready to rebloom in the next season.
Step 2: Preparing Lilies for Winter
Winter preparation is essential for lilies, especially in colder climates. Once the foliage has yellowed, trim it back to the base to prevent fungal diseases. Leaving dead foliage on the plant through winter can increase the risk of rot and pest infestations. To protect bulbs from freezing temperatures, apply a 2- to 3-inch layer of mulch, such as straw, shredded leaves, or pine needles. This insulation helps regulate soil temperature and prevents frost heaving. In areas with harsh winters, consider covering the lily bed with additional protective materials like burlap or garden fabric. If growing lilies in containers, move them to a sheltered location to avoid excessive exposure to freezing temperatures. By properly winterizing your lilies, you set the stage for healthy growth and a robust blooming cycle in the spring.
Step 3: Dividing and Transplanting Lilies
Over time, lily bulbs multiply and can become overcrowded, leading to smaller blooms or a lack of flowers. To maintain healthy lilium, divide the bulbs every 3-5 years. The best time to do this is in early fall after the foliage has died back. Carefully dig up the bulbs, being cautious not to damage them. Separate the smaller offset bulbs from the main clump and inspect for signs of disease or rot. Replant the divided bulbs immediately in a well-draining, nutrient-rich soil. Space them at least 8-12 inches apart to allow for proper airflow and growth. Water them well after transplanting to help establish strong roots before winter dormancy. By regularly dividing and transplanting your lilies, you encourage healthier plants, prevent overcrowding, and ensure a stunning floral display year after year.
Common Problems with Lilies and How to Fix Them

Lilies are beloved for their elegant blooms, but like any garden plant, they can encounter issues that affect their growth and flowering. By identifying common problems early, you can take the necessary steps to restore your lilies to health. Whether it’s a lack of blooms, yellowing leaves, or falling over, understanding the cause of the problem is key to finding a solution. Addressing issues like insufficient sunlight, poor soil drainage, or weak stems can help keep your lilium thriving and ensure they continue to produce beautiful flowers year after year. Proper care, regular maintenance, and early intervention can go a long way in maintaining their beauty. In this section, we will explore some of the most frequent problems lilies face and provide solutions to fix them.
By staying vigilant and following these simple solutions, you can enjoy the vibrant beauty of lilies in your garden. Keep in mind that their specific needs for light, water, and space should always be met to prevent common issues. With a little extra care, your lilies will reward you with stunning blooms that brighten up any garden or indoor space.
Troubleshooting Guide
Lilies may face various issues during their growth, but with careful observation, most problems can be easily addressed. In this section, we will highlight some common issues and provide straightforward solutions to keep your lilium in top shape. Take note of these tips to ensure healthy, beautiful flowers throughout the growing season.
Issue 1: Lilies Not Blooming
One of the most common problems with lilies is a lack of blooming. If your lilies aren’t producing flowers, it’s important to examine their growing conditions to determine the cause. Insufficient sunlight or overcrowded bulbs are typically the culprits. Lilies require full sun to produce vibrant blooms, and if they are planted too close together, they may struggle to grow properly.
Cause:
- Insufficient sunlight: Lilies need 6-8 hours of direct sunlight a day to bloom.
- Overcrowded bulbs: Bulbs planted too closely together compete for nutrients and space, reducing their ability to bloom.
Solution:
- Move to a sunnier location: Relocate your lilies to a spot that gets more sunlight.
- Divide bulbs regularly: Separate the bulbs every 3-4 years to give them room to grow.
Issue 2: Yellowing Leaves or Weak Growth
Yellowing leaves or weak growth can indicate an underlying issue with water and soil conditions. Overwatering and poor soil drainage are common causes for lilies struggling to thrive, leading to yellowing foliage and stunted growth.
Cause:
- Overwatering: Consistently wet soil can promote root rot, causing leaves to yellow and weaken the plant.
- Poor soil drainage: Without proper drainage, roots suffocate, and waterlogged soil can lead to poor growth.
Solution:
- Improve drainage: Incorporate organic matter or sand into the soil to improve drainage and prevent waterlogging.
- Allow soil to dry between watering: Let the top inch of soil dry out between waterings to avoid overwatering.
Issue 3: Lilies Falling Over
Lilies are tall, elegant flowers, but their heavy blooms and weak stems can sometimes cause them to topple over. When the blooms are large and the stems aren’t strong enough to support them, the plant may fall over, potentially damaging the flowers. This can be particularly problematic during windy conditions or after a heavy rain.
Cause:
- Heavy blooms: Large, top-heavy flowers can make lilies unstable.
- Weak stems: Some lilies have naturally weak stems that can bend under the weight of their flowers.
Solution:
- Use plant supports: Install stakes, cages, or other supports to help keep the stems upright as they grow.
- Plant in clusters: By planting lilies in groups, the stems can support each other, preventing them from falling over.
Propagating Lilies: Growing More Beautiful Blooms
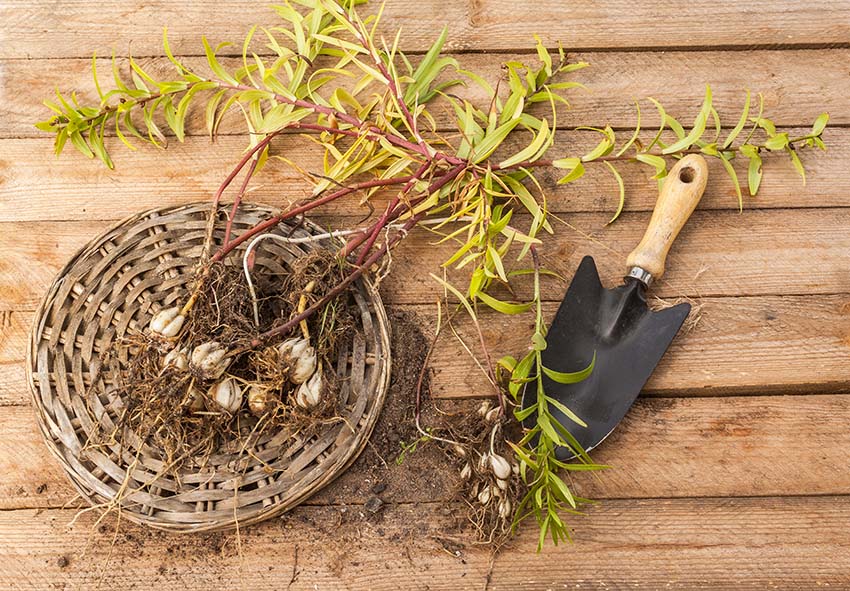
Propagating lilium is a rewarding way to grow more of these stunning flowers in your garden. Whether you’re working with hybrid lilies or classic varieties, multiplying lilies can be done through different methods, including dividing bulbs and growing from seeds. Both approaches can help you expand your lily collection and enjoy their beautiful blooms year after year. While the process takes patience, the results are well worth the effort, as you’ll be able to create a lush garden full of lilies with varying colors and sizes. Propagating lilies can be done either by separating offsets from mature bulbs or by starting them from seed. If done properly, your lilies will continue to flourish and thrive in your garden. The key is to follow the correct methods, choose the right time, and provide optimal conditions for your lilies to develop strong roots and healthy flowers.
In this section, we will go over the two most common methods of lily propagation: dividing bulbs and growing from seeds. Each method has its benefits and requires some patience, but with a little care and attention, you’ll soon see the fruits of your labor in the form of more vibrant lilies to enjoy.
How to Propagate Lilies Step-by-Step
To propagate lilies, you can either divide the bulbs or start from seeds. Dividing bulbs in late summer after flowering ensures healthy, mature plants that will bloom the following year. Alternatively, growing lilies from seed is a slower process but can result in unique and exciting varieties.
Step 1: Dividing Lily Bulbs (The Best Method)
The most straightforward method of propagating lilies is by dividing the bulbs. This should be done after the flowering season has ended, usually in late summer. Dig up the bulbs carefully, ensuring you don’t damage the roots. Look for smaller offset bulbs that have formed around the parent bulb. These smaller bulbs can be separated and replanted immediately. Make sure to plant them in well-draining soil, as lilies prefer soil that isn’t too compact.
After replanting, space the bulbs adequately to allow for growth. Dividing bulbs is the most reliable way to propagate lilies, as the offset bulbs typically bloom the following season. This method not only allows for the multiplication of your lilies but also helps rejuvenate older plants that may not be flowering as vigorously. If you want to multiply your lilies quickly and efficiently, dividing bulbs is the best method.
Step 2: Growing Lilies from Seeds
Growing lilies from seeds is a more time-consuming but rewarding method of propagation. To start, collect mature seed pods from your lilies in the fall. Once harvested, extract the seeds and sow them in a well-draining, sterile seed-starting mix. Germination requires a warm and well-lit area with temperatures ranging between 70-80°F (21-27°C). Keep the soil moist but not soggy. Be aware that it may take 2-5 years for the seeds to grow into mature lilies that bloom.
While this method requires patience, it can result in unique, genetically diverse lilies. You may even discover new color variations or traits in the flowers. Growing lilies from seeds can be an exciting experiment for gardeners who enjoy nurturing plants from their very beginning stages. Although it takes longer, growing lilies from seeds offers the opportunity to produce one-of-a-kind plants that are not available through commercial bulb sales.
Frequently Asked Questions (FAQs) about Lilies
1. Are lilies toxic to pets?
Yes, lilies are highly toxic to cats. Even small amounts—such as pollen or water from a vase—can cause severe kidney failure. It’s best to avoid growing or displaying lilies indoors if you have cats. Dogs are less affected, but ingestion can still cause stomach upset. Always keep lilies out of reach of pets and consider pet-safe alternatives for indoor flower arrangements.
2. Can I order lilies from your online store?
Yes, you can! Our online store Dutch-bulbs.com offers a wide selection of lilies plants, including different varieties and colors. We take pride in providing top-quality plants that are carefully cultivated and shipped with care to ensure they reach you in perfect condition. Visit our online store to explore our collection and place your order for a delightful addition to your home or garden.
3. How do I care for lilies after they bloom?
After your lilies finish blooming, cut the spent flowers but leave the stems and leaves intact. This allows the plant to photosynthesize and store energy for next year’s growth. Continue watering and feeding with a balanced fertilizer until the foliage yellows and dies back naturally. At that point, you can trim it down to ground level and mulch the area for winter protection if the lilies are planted outdoors.
4. Why aren’t my lilies flowering?
If your lilies aren’t blooming, they may be planted too shallow, overcrowded, or not receiving enough sunlight. Lilies require at least 6 hours of direct sunlight per day and well-drained soil. Bulbs also need time to mature—newly planted bulbs may not flower their first year. Ensure you’re feeding them with a low-nitrogen fertilizer and allowing leaves to remain after blooming so the bulbs can recharge.
5. Can I grow lilies indoors in containers?
Yes, many lily varieties grow well indoors in containers, especially dwarf or Asiatic types. Use a deep pot with drainage holes and high-quality, well-draining potting mix. Plant the bulbs with the pointed end up, cover with soil, and place in a bright, sunny spot. Water moderately and provide cool temperatures until growth begins. Once blooming, keep the plant in indirect light to prolong flower life.
Published: 14.04.2025
